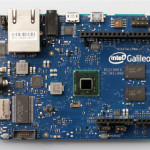
Galileo is an Arduino that runs on a (x86) Intel® Quark X1000 SOC.

While it’s fully compatible with Arduino Software Development Environment, it’s also capable of running a full Linux distribution.
Sept. 2014 update: GCC and other dev tools are now part of the official linux image you can download from Intel Developer Zone.
You can get such distribution from the official website. The “LINUX IMAGE FOR SD for Intel Galileo” is a poky distribution built using Yocto. It’s using uClibc and contains useful binaries like SSHd, bluez, nodejs and OpenCV while it can still run Arduino sketches !
It’s really simple to install it: you only need to unzip the .7z package at the root of a FAT32 formatted microSD.
I’ve came across some interesting nodejs modules, and some of them are relying on native extensions. Cross-compiling these seemed complicated so I’ve chosen another way to get these working on my Galileo: rebuilding the poky distribution to add dev tools.
And while it may sound complicated… it’s in fact dead simple thanks to the way Yocto is working.
First set up your build environment the same way you would build the same image than the one distributed on the official website, by downloading Galileo BSP and setting up Yocto:
wget http://downloadmirror.intel.com/23171/eng/Board_Support_Package_Sources_for_Intel_Quark_v0.7.5.7z
7z x Board_Support_Package_Sources_for_Intel_Quark_v0.7.5.7z
tar xzvf Board_Support_Package_Sources_for_Intel_Quark_v0.7.5/meta-clanton_v0.7.5.tar.gz
cd meta-clanton_v0.7.5
./setup.sh
source poky/oe-init-build-env yocto_build
Stop here to create your custom configuration:
cp ../meta-clanton-distro/recipes-core/images/image-full.bb ../meta-clanton-distro/recipes-core/images/image-custom.bb
Here I’ve chosen to triple the filesystem size to make it around 900mo:
IMAGE_ROOTFS_SIZE = "921600"
added -dev packages to the image by adding dev-pkgs feature:
IMAGE_FEATURES += "package-management dev-pkgs"
added the tools I wanted by adding this line:
IMAGE_INSTALL += "autoconf automake binutils binutils-symlinks cpp cpp-symlinks gcc gcc-symlinks g++ g++-symlinks gettext make libstdc++ libstdc++-dev file coreutils"
and also integrated the right firmware for my Wi-Fi/BT4.0 chipset (Centrino 6235) by adding this line:
IMAGE_INSTALL += "linux-firmware-iwlwifi-6000g2b-6"
Finally you can build your custom distribution:
bitbake image-custom
For me this process took around 20GB space and around an hour of automated download/build. Once its done you’ll find your generated files inside yocto_build/tmp/deploy/images. You can copy these to your microSD like so:
- latest bzImage-* as bzImage
- latest core-image-minimal-initramfs-* as core-image-minimal-initramfs-clanton.cpio.gz
- latest image-* as image-full-clanton.ext3
- boot folder as boot
Now you can easily get useful nodejs modules with native extensions – they will be compiled on the Galileo itself :
And if you don’t have the time and bandwidth to spare, you can directly download the custom image I’ve generated 🙂
update: There is now an official SD image with gcc support: https://software.intel.com/en-us/iotdevkit
If you want to get more information on how to build your own image or learn how to use another libc than uClibc, you should read this article: Intel Galileo – Building Linux Image
PS: I’ve encountered one small bug with the image I’ve generated, stdbuf couldn’t find ‘libstdbuf.so’. You can easily fix this by running ln -s /usr/lib/coreutils/libstdbuf.so /usr/lib/coreutils/coreutils/

