<?xml version="1.0" encoding="utf-8"?><feed xmlns="http://www.w3.org/2005/Atom" ><generator uri="https://jekyllrb.com/" version="3.10.0">Jekyll</generator><link href="https://ph0b.com/feed.xml" rel="self" type="application/atom+xml" /><link href="https://ph0b.com/" rel="alternate" type="text/html" /><updated>2025-04-09T16:06:51+00:00</updated><id>https://ph0b.com/feed.xml</id><title type="html">ph0b.com</title><subtitle>Former Software Engineer at Intel and Google Developer Expert for Android, blogging in a personal capacity</subtitle><author><name>Xavier Hallade</name></author><entry><title type="html">Running Blender Cycles SYCL backend on AMD and Nvidia GPUs</title><link href="https://ph0b.com/blender-cycles-sycl-amd-nvidia-gpus/" rel="alternate" type="text/html" title="Running Blender Cycles SYCL backend on AMD and Nvidia GPUs" /><published>2025-04-08T10:45:08+00:00</published><updated>2025-04-08T10:45:08+00:00</updated><id>https://ph0b.com/Running%20Blender%20Cycles%20SYCL%20backend%20on%20AMD%20and%20Nvidia%20GPUs</id><content type="html" xml:base="https://ph0b.com/blender-cycles-sycl-amd-nvidia-gpus/"><![CDATA[<p>Blender offers two primary renderers: EEVEE, a 3D rasterizer utilizing graphics APIs like OpenGL, Metal, Vulkan (in the works); and Cycles, a path tracer that supports CPU and GPGPU APIs such as CUDA, Metal, HIP, and SYCL.</p>

<p>In Cycles, SYCL is currently used solely to target Intel GPUs, but one of SYCL’s goal is to deliver high performance across various GPU vendors.</p>

<p>Is this goal currently achieved with Cycles? That’s actually easy to try, let’s see!</p>

<p>Ever since we’ve introduced SYCL support in 2022, we already had put a lot in place to keep this multi-vendors support in, and we tried to avoid introducing Intel GPUs specific changes that would break it.</p>

<p>Such things could still ended up in the codebase, breaking or lowering runtime performance.</p>

<p>I’ve recently went on testing this support again, and cleaned up a few of them in the past weeks:</p>

<ul>
  <li><a href="https://projects.blender.org/blender/blender/commit/7a257359f8abfee93cae6daf3bb0552d37aece26">Cycles: oneAPI: Use max_compute_units in get_num_multiprocessors</a></li>
  <li><a href="https://projects.blender.org/blender/blender/commit/3dd6104c87caffac31058761b1df3f6fdb3de314">Fix building for non-Intel SYCL targets without ocloc</a></li>
  <li><a href="https://projects.blender.org/blender/blender/commit/795a76029a1d9afe652e2f9481b15e61cfc33b72">Cycles: oneAPI: Restrict use of experimental copy optimization to L0</a></li>
  <li>…</li>
</ul>

<p>So, while it was all already possible with the same steps since Blender 3.3, you’ll run into less issues now with Blender 4.5 alpha 31633d14b53c and newer (from April 4).</p>

<h2 id="step-1-get-a-sycl-compiler-with-support-for-amd-and-nvidia-gpus">Step 1: Get a SYCL compiler with support for AMD and Nvidia GPUs</h2>

<p>Blender is using several important oneAPI extensions to SYCL, hence a version of oneAPI DPC++ compiler is required.</p>

<p>Blender is using and providing a self-compiled version of oneAPI DPC++ compiler 6.0.1, with only support for Intel GPUs.</p>

<p>You currently have 3 possibilities to get one with also AMD and Nvidia support:</p>

<ol>
  <li>Get a binary release of <a href="https://github.com/intel/llvm">intel/llvm</a>: Linux packages for nightlies do contain AMD and Nvidia GPUs support. These releases are compiled on Ubuntu 22.04 so are compatible with distributions using glibc 2.35 or higher.</li>
  <li>Build your own version of <a href="https://github.com/intel/llvm">intel/llvm</a>: to get a build supporting AMD and Nvidia GPUs on Windows or any flavor of Linux. Compile time is rather long but the process is straightforward, documented here: <a href="https://github.com/intel/llvm/blob/acf6d3ba65aed812e3f27e487e5028c62ceac5e1/sycl/doc/GetStartedGuide.md">https://github.com/intel/llvm/blob/acf6d3ba65aed812e3f27e487e5028c62ceac5e1/sycl/doc/GetStartedGuide.md</a>
    <ol>
      <li>HIP on Windows can work almost straight since <a href="https://github.com/intel/llvm/commit/999c682f583faf05ed5f6091b8c4946daed7d1bd">https://github.com/intel/llvm/commit/999c682f583faf05ed5f6091b8c4946daed7d1bd</a>. It has one remaining compilation issue with <code class="language-plaintext highlighter-rouge">__vectorcall</code>, worked on in <a href="https://github.com/intel/llvm/issues/7738">https://github.com/intel/llvm/issues/7738</a></li>
    </ol>
  </li>
  <li>Get the proprietary version from intel.com, with the Codeplay plugins: <a href="https://codeplay.com/solutions/oneapi/plugins/">https://codeplay.com/solutions/oneapi/plugins/</a></li>
</ol>

<p>On my end, I went with option 2, on Windows, using Cuda 12.8, HIP SDK 6.2.4, VS2022 17.12.1, and nightly-2025-04-01@intel/llvm.</p>

<h2 id="step-2-build-blender-with-specific-cmake-options">Step 2: Build Blender with specific CMake options</h2>

<p>You should follow the standard’s Blender documentation: <a href="https://developer.blender.org/docs/handbook/building_blender/">https://developer.blender.org/docs/handbook/building_blender/</a></p>

<p>Once done, you can come back and diverge from the default configuration, and edit your CMake configuration with:</p>

<ul>
  <li><code class="language-plaintext highlighter-rouge">SYCL_ROOT_DIR=</code>your path to oneAPI DPC++ compiler</li>
  <li><code class="language-plaintext highlighter-rouge">WITH_CYCLES_EMBREE=OFF</code> # Embree is not supported on Nvidia and AMD backends and there is currently no logic to disable it per-target</li>
  <li><code class="language-plaintext highlighter-rouge">CYCLES_ONEAPI_SYCL_TARGETS=amdgcn-amd-amdhsa;nvptx64-nvidia-cuda;spir64_gen</code></li>
  <li><code class="language-plaintext highlighter-rouge">CYCLES_ONEAPI_SYCL_OPTIONS_amdgcn-amd-amdhsa=--offload-arch=gfx1032</code></li>
  <li><code class="language-plaintext highlighter-rouge">CYCLES_ONEAPI_SYCL_OPTIONS_nvptx64-nvidia-cuda=--offload-arch=sm_86</code></li>
</ul>

<p>Where gfx1032 and sm_86 correspond to the AMD and Nvidia devices you want to build for.</p>

<p>In this case, newer sm_9x and higher nvidia devices will still run after recompiling from the embed PTX, but there is no such mechanism for AMD, so make sure to pick the right device. (Yes, that’s quite a blocking issue if you want your build to be able to run on various AMD devices).</p>

<h2 id="step-3-set-cycles_oneapi_all_devices-environment-variable-and-run">Step 3: Set CYCLES_ONEAPI_ALL_DEVICES environment variable and run</h2>

<p>To avoid having enumeration issues and users complaining about failures on unsupported devices, only recent Intel GPUs are made accessible out of the box in Blender.<br />
To remove this limitation and show more SYCL devices, set <code class="language-plaintext highlighter-rouge">CYCLES_ONEAPI_ALL_DEVICES=1</code> environment variable before running Blender.</p>

<h2 id="step-4-profit-and-measure">Step 4: Profit and Measure</h2>

<p>All devices can be now selected in System-&gt;Preferences.</p>

<p><a href="http://ph0b.com/wp-content/uploads/2025/04/multi-vendors-cycles-preferences.png"><img src="http://ph0b.com/wp-content/uploads/2025/04/multi-vendors-cycles-preferences.png" alt="Blender System preferences listing oneAPI devices with Intel, AMD, Nvidia GPUs" /></a></p>

<p>Rendering can even happen concurrently on these various devices but Cycles scales well across devices only when their performance is equal, so using such Blender build for this purpose is not necessarily a good idea.</p>

<p>What’s more interesting is that you can use native vendor tools for debugging and profiling, such as Nvidia Nsight Compute below, with proper source linking when compiling with <code class="language-plaintext highlighter-rouge">-g</code>:</p>

<p><a href="http://ph0b.com/wp-content/uploads/2025/04/nsight.png"><img src="http://ph0b.com/wp-content/uploads/2025/04/nsight.png" alt="Nvidia nsight with source code - SASS mapping" /></a></p>

<p>And how is performance, at the moment?</p>

<p>It’s competitive! See below a comparison of the speed on a RTX3080:</p>

<p><a href="http://ph0b.com/wp-content/uploads/2025/04/oneapi-cuda.png"><img src="http://ph0b.com/wp-content/uploads/2025/04/oneapi-cuda.png" alt="oneAPI on CUDA at &gt;95% of native CUDA speed" /></a></p>

<p>I’ve deviated from the original build by also adding CMake option <code class="language-plaintext highlighter-rouge">SYCL_CPP_FLAGS=-Xcudaptxas --maxrregcount=128</code>, as it’s what ptxas chooses with native CUDA, and it gives a good speedup.</p>

<p>Such comparison between oneAPI and CUDA is fair and shows how good SYCL is already.</p>

<h3 id="is-there-a-catch">Is there a catch?</h3>

<p>Blender Cycles is a bit specific as a good portion of the execution is spent on kernels doing intersection, that can be accelerated using Hardware Ray Tracing.</p>

<p>Hardware Ray Tracing is enabled on Nvidia GPUs when using the OptiX backend instead of the CUDA backend, you can see what it practically means by looking at aggregated kernel times below, generated using <code class="language-plaintext highlighter-rouge">--verbose 4</code> blender argument and <code class="language-plaintext highlighter-rouge">CYCLES_PER_KERNEL_PERFORMANCE</code> environment variable.</p>

<p><a href="http://ph0b.com/wp-content/uploads/2025/04/cuda-optix.png"><img src="http://ph0b.com/wp-content/uploads/2025/04/cuda-optix.png" alt="CUDA vs OptiX" /></a></p>

<p>Apart Intel’s Embree that of course does mix well with SYCL, current vendor specific SDKs (OptiX, HIP-RT), as well as cross-platform Vulkan Ray Tracing, cannot be efficiently mixed with anything else. 
What I mean with “efficiently” here is that, for good performance, we need hardware ray tracing calls to get called inline from the kernels doing intersections, and that’s not something that can be achieved with high-level interoperability.</p>

<p>Nonetheless, it’s pleasing to see SYCL performance for a complex real world code base like Cycles does deliver. Sure, it does so while we don’t take into consideration the intersection kernels relying on hardware acceleration, but this part is a quite specific case.</p>

<h3 id="troubleshooting-typical-issues">Troubleshooting typical issues</h3>

<h4 id="compilation-errors">Compilation errors</h4>

<p><code class="language-plaintext highlighter-rouge">clang-offload-wrapper: error: '--offload-compress' option is specified but zstd is not available. The device image will not be compressed.</code>: Blender 4.4 and higher have enabled device images compression so it sets <code class="language-plaintext highlighter-rouge">--offload-compress</code> when compiling the kernels library. It’s however quite easy to get a compiler that lacks support for it and unfortunately, it errors out.
I’ve opened a PR to turn the error into a warning: <a href="https://github.com/intel/llvm/pull/17914">github.com/intel/llvm/pull/17914</a></p>

<p>Meanwhile, the solution is to build oneAPI DPC++ with <code class="language-plaintext highlighter-rouge">LLVM_ENABLE_ZSTD=FORCE_ON</code> instead of <code class="language-plaintext highlighter-rouge">LLVM_ENABLE_ZSTD=ON</code> to avoid silently running into this scenario when building the compiler, or to work around it by commenting out <code class="language-plaintext highlighter-rouge">--offload-compress --offload-compression-level=19</code> from <code class="language-plaintext highlighter-rouge">./intern/cycles/kernel/CMakelists.txt</code>.</p>

<h4 id="devices-not-enumerating">Devices not enumerating</h4>

<p>Devices failing to enumerate can be due to missing runtime dependencies, this can be traced with <code class="language-plaintext highlighter-rouge">SYCL_UR_TRACE=1</code> environment variable, verified with <code class="language-plaintext highlighter-rouge">ldd</code> on Linux and <a href="DependenciesGUI">https://github.com/lucasg/Dependencies</a> on Windows.</p>

<p>On Linux, Blender calls <code class="language-plaintext highlighter-rouge">patchelf --set-rpath $ORIGIN</code> on its versions of all the shared libraries when building them, doing the same should fix most issues. Another temporary solution for testing is to add the compiler’s lib folder to <code class="language-plaintext highlighter-rouge">LD_LIBRARY_PATH</code> environment variable.</p>]]></content><author><name>Xavier Hallade</name></author><category term="Blender" /><category term="Blender" /><category term="SYCL" /><category term="GPU" /><summary type="html"><![CDATA[Blender offers two primary renderers: EEVEE, a 3D rasterizer utilizing graphics APIs like OpenGL, Metal, Vulkan (in the works); and Cycles, a path tracer that supports CPU and GPGPU APIs such as CUDA, Metal, HIP, and SYCL.]]></summary></entry><entry><title type="html">The new NDK support in Android Studio</title><link href="https://ph0b.com/new-android-studio-ndk-support/" rel="alternate" type="text/html" title="The new NDK support in Android Studio" /><published>2015-08-17T17:50:08+00:00</published><updated>2015-08-17T17:50:08+00:00</updated><id>https://ph0b.com/new-android-studio-ndk-support</id><content type="html" xml:base="https://ph0b.com/new-android-studio-ndk-support/"><![CDATA[<p>During Google I/O 2015, end of May, Google announced a new support for the NDK by Android Studio 1.3, integrating Jetbrains CLion capabilities, and the Android gradle plugin. This support has been released only in July, and while it’s really promising, it’s still in heavy development.</p>

<p>The new NDK support requires the use of Android Studio 1.3 RC1+/2.0+ and the android gradle-experimental plugin. This article is for those who are willing to give it a try. If you’re looking into the NDK support while using the gradle(-stable) plugin, you can check this older (but still up-to-date) <a href="http://ph0b.com/android-studio-gradle-and-ndk-integration/">article on the NDK and Android Studio</a>.</p>

<p><strong>last update – 2016/09/20: Android Studio 2.2 now supports external CMake and ndk-build tools very well. It’s in my view much better than the gradle-experimental plugin explained here. Please follow this guide to learn how to use it: <a href="https://developer.android.com/studio/projects/add-native-code.html">https://developer.android.com/studio/projects/add-native-code.html</a></strong></p>

<h2 id="migrating-to-the-gradle-experimental-plugin-and-the-new-comandroidmodel">Migrating to the gradle-experimental plugin and the new com.android.model.*</h2>

<p>The gradle-experimental 0.7.2 requires using gradle-2.10. Start by setting it from your project settings:</p>

<p><a href="http://ph0b.com/wp-content/uploads/2015/08/gradle-2-5.png"><img src="http://ph0b.com/wp-content/uploads/2015/08/gradle-2-5.png" alt="gradle-2-5" /></a></p>

<p>Or inside <em>gradle/wrapper/gradle-wrapper.properties:</em></p>

<div class="language-gradle highlighter-rouge"><div class="highlight"><pre class="highlight"><code><span class="n">distributionUrl</span><span class="o">=</span><span class="n">https</span><span class="err">\</span><span class="o">:</span><span class="c1">//services.gradle.org/distributions/gradle-2.10-all.zip</span>
</code></pre></div></div>

<p>Then, change the reference to the android gradle plugin to the new gradle-experimental plugin, from <em>./build.gradle</em>:</p>

<div class="language-gradle highlighter-rouge"><div class="highlight"><pre class="highlight"><code><span class="c1">// Top-level build file where you can add configuration options common to all sub-projects/modules.</span>

<span class="k">buildscript</span> <span class="o">{</span>
    <span class="k">repositories</span> <span class="o">{</span>
        <span class="n">jcenter</span><span class="o">()</span>
    <span class="o">}</span>
    <span class="k">dependencies</span> <span class="o">{</span>
        <span class="n">classpath</span> <span class="s1">'com.android.tools.build:gradle-experimental:0.7.2'</span>
    <span class="o">}</span>
<span class="o">}</span>
</code></pre></div></div>

<p>The gradle-experimental plugin introduces a change in the DSL. The android plugins <em>com.android.model.application</em> and <em>com.android.model.library</em> are replacing the former <em>com.android.applicatio</em>n and <em>com.android.library</em> plugins.</p>

<p>You need to migrate your apps and libs <em>build.gradle</em> files to use these new plugins. Here is an example of the same configuration, with the old DSL (top) and the new (bottom):</p>

<div class="language-gradle highlighter-rouge"><div class="highlight"><pre class="highlight"><code><span class="n">apply</span> <span class="nl">plugin:</span> <span class="s1">'com.android.application'</span>

<span class="n">android</span> <span class="o">{</span>
    <span class="n">compileSdkVersion</span> <span class="n">rootProject</span><span class="o">.</span><span class="na">ext</span><span class="o">.</span><span class="na">compileSdkVersion</span>
    <span class="n">buildToolsVersion</span> <span class="n">rootProject</span><span class="o">.</span><span class="na">ext</span><span class="o">.</span><span class="na">buildToolsVersion</span>

    <span class="n">defaultConfig</span> <span class="o">{</span>
        <span class="n">applicationId</span> <span class="s2">"com.ph0b.example"</span>
        <span class="n">minSdkVersion</span> <span class="mi">15</span>
        <span class="n">targetSdkVersion</span> <span class="mi">23</span>
        <span class="n">versionCode</span> <span class="mi">4</span>
        <span class="n">versionName</span> <span class="s2">"1.0.1"</span>

        <span class="n">ndk</span> <span class="o">{</span>
            <span class="n">moduleName</span> <span class="s2">"mymodule"</span>
            <span class="n">ldLibs</span> <span class="s2">"log"</span>
            <span class="n">stl</span> <span class="s2">"gnustl_static"</span>
            <span class="n">cFlags</span> <span class="s2">"-std=c++11 -fexceptions"</span>
        <span class="o">}</span>
    <span class="o">}</span>

    <span class="n">signingConfigs</span> <span class="o">{</span>
        <span class="n">release</span> <span class="o">{</span>
            <span class="n">storeFile</span> <span class="nf">file</span><span class="o">(</span><span class="n">STORE_FILE</span><span class="o">)</span>
            <span class="n">storePassword</span> <span class="n">STORE_PASSWORD</span>
            <span class="n">keyAlias</span> <span class="n">KEY_ALIAS</span>
            <span class="n">keyPassword</span> <span class="n">KEY_PASSWORD</span>
        <span class="o">}</span>
    <span class="o">}</span>

    <span class="n">buildTypes</span> <span class="o">{</span>
        <span class="n">release</span> <span class="o">{</span>
            <span class="n">minifyEnabled</span> <span class="kc">true</span>
            <span class="n">shrinkResources</span> <span class="kc">true</span>
            <span class="n">proguardFiles</span> <span class="nf">getDefaultProguardFile</span><span class="o">(</span><span class="s1">'proguard-android-optimize.txt'</span><span class="o">),</span> <span class="s1">'proguard-rules.txt'</span>
            <span class="n">signingConfig</span> <span class="n">signingConfigs</span><span class="o">.</span><span class="na">release</span>
        <span class="o">}</span>
        <span class="n">debug</span> <span class="o">{</span>
            <span class="n">jniDebuggable</span> <span class="kc">true</span>
        <span class="o">}</span>
    <span class="o">}</span>
<span class="o">}</span>
</code></pre></div></div>

<div class="language-gradle highlighter-rouge"><div class="highlight"><pre class="highlight"><code><span class="n">apply</span> <span class="nl">plugin:</span> <span class="s1">'com.android.model.application'</span>

<span class="n">model</span> <span class="o">{</span>
    <span class="n">android</span> <span class="o">{</span>
        <span class="n">compileSdkVersion</span> <span class="n">rootProject</span><span class="o">.</span><span class="na">ext</span><span class="o">.</span><span class="na">compileSdkVersion</span>
        <span class="n">buildToolsVersion</span> <span class="n">rootProject</span><span class="o">.</span><span class="na">ext</span><span class="o">.</span><span class="na">buildToolsVersion</span>
    
        <span class="n">defaultConfig</span> <span class="o">{</span>
            <span class="n">applicationId</span> <span class="s2">"com.ph0b.example"</span>
            <span class="n">minSdkVersion</span><span class="o">.</span><span class="na">apiLevel</span> <span class="mi">15</span>
            <span class="n">targetSdkVersion</span><span class="o">.</span><span class="na">apiLevel</span> <span class="mi">23</span>
            <span class="n">versionCode</span> <span class="mi">4</span>
            <span class="n">versionName</span> <span class="s2">"1.0.1"</span>
        <span class="o">}</span>
    <span class="o">}</span>

    <span class="n">android</span><span class="o">.</span><span class="na">ndk</span> <span class="o">{</span>
        <span class="n">moduleName</span> <span class="s2">"mymodule"</span>
        <span class="n">ldLibs</span><span class="o">.</span><span class="na">addAll</span><span class="o">([</span><span class="s1">'log'</span><span class="o">])</span>
        <span class="n">cppFlags</span><span class="o">.</span><span class="na">add</span><span class="o">(</span><span class="s2">"-std=c++11"</span><span class="o">)</span>
        <span class="n">cppFlags</span><span class="o">.</span><span class="na">add</span><span class="o">(</span><span class="s2">"-fexceptions"</span><span class="o">)</span>
        <span class="n">platformVersion</span> <span class="mi">15</span>
        <span class="n">stl</span> <span class="s1">'gnustl_shared'</span>
    <span class="o">}</span>

    <span class="n">android</span><span class="o">.</span><span class="na">signingConfigs</span> <span class="o">{</span>
        <span class="n">create</span><span class="o">(</span><span class="s2">"release"</span><span class="o">)</span> <span class="o">{</span>
            <span class="n">keyAlias</span> <span class="n">KEY_ALIAS</span>
            <span class="n">keyPassword</span> <span class="n">STORE_PASSWORD</span>
            <span class="n">storeFile</span> <span class="nf">file</span><span class="o">(</span><span class="n">STORE_FILE</span><span class="o">)</span>
            <span class="n">storePassword</span> <span class="n">KEY_PASSWORD</span>
        <span class="o">}</span>
    <span class="o">}</span>

    <span class="n">android</span><span class="o">.</span><span class="na">buildTypes</span> <span class="o">{</span>
        <span class="n">release</span> <span class="o">{</span>
            <span class="n">shrinkResources</span> <span class="kc">true</span>
            <span class="n">useProguard</span> <span class="kc">true</span>
            <span class="n">proguardFiles</span><span class="o">.</span><span class="na">add</span><span class="o">(</span><span class="n">file</span><span class="o">(</span><span class="s1">'proguard-rules.txt'</span><span class="o">))</span>
            <span class="n">signingConfig</span> <span class="o">=</span> <span class="n">$</span><span class="o">(</span><span class="s2">"android.signingConfigs.release"</span><span class="o">)</span>
        <span class="o">}</span>
    <span class="o">}</span>
<span class="o">}</span>
</code></pre></div></div>

<p>To summarize the changes required: all the android declarations are now going under <em>model {},</em> <del>the various assignments now have to use explicitly ‘<em>=</em>‘</del><em>,</em> collections must not be overwritten, use <em>.removeAll()</em>, <em>.add()</em>, <em>.addAll()</em> instead. Variants and other new configurations have to be declared using ‘<em>create()</em>‘. Properties like <em>xxxSdkVersion</em> have changed to <em>xxxSdkVersion.apiLevel</em>.</p>

<p>As it’s experimental, you can expect regular changes around the DSL across versions. For example, <em>minifyEnabled</em> has been changed to <em>isMinifyEnabled,</em> then to <em>minifyEnabled</em> again, and now there is also <em>useProguard;</em> <em>jniDebuggable</em> has been changed to <em>isJniDebuggable</em> and then to <em>ndk.debuggable</em> (and is now set by default for debug builds).</p>

<p>You’ll notice that with both DSLs, there is a configuration block for the NDK. This is the place where you’re supposed to set all the NDK configuration when using gradle, as by default <em>Android.mk</em> and <em>Application.mk</em> files will be simply ignored.</p>

<h2 id="enjoying-the-new-cndk-support-in-android-studio">Enjoying the new C++/NDK support in Android Studio</h2>

<p>To activate the C++/NDK support inside Android Studio, you only need to have a NDK module declared inside your application or library build.gradle:</p>

<div class="language-gradle highlighter-rouge"><div class="highlight"><pre class="highlight"><code><span class="n">model</span> <span class="o">{</span>
    <span class="n">android</span> <span class="o">{</span>
    <span class="c1">//...</span>
    <span class="n">ndk</span> <span class="o">{</span>
        <span class="n">moduleName</span> <span class="s2">"mymodule"</span>
    <span class="o">}</span>
  <span class="o">}</span>
<span class="o">}</span>
</code></pre></div></div>

<p>Once it’s done, you can go to your Java sources, create a method prefixed with the <em>native</em> keyword, and press ALT+Enter to generate its C or C++ implementation:</p>

<p><a href="http://ph0b.com/wp-content/uploads/2015/08/AS-ndk-demo1.gif"><img src="http://ph0b.com/wp-content/uploads/2015/08/AS-ndk-demo1.gif" alt="AS-ndk-demo" /></a></p>

<p>Yes, it’s that magical 🙂</p>

<p>The implementation will be added under ‘<em>jni</em>‘, inside an existing cpp file if there is one, or inside a new one.</p>

<p>In order to get started with NDK modules, you can have a look at all the samples that have been ported to use the new gradle-experimental plugin: <a href="https://github.com/googlesamples/android-ndk">https://github.com/googlesamples/android-ndk</a></p>

<p>Here is everything you can configure for a ndk module:</p>

<div class="language-gradle highlighter-rouge"><div class="highlight"><pre class="highlight"><code>    <span class="n">android</span><span class="o">.</span><span class="na">ndk</span> <span class="o">{</span>
        <span class="n">moduleName</span> <span class="o">=</span> <span class="s2">"mymodule"</span>
        <span class="n">ldLibs</span><span class="o">.</span><span class="na">addAll</span><span class="o">([</span><span class="s1">'log'</span><span class="o">])</span>
        <span class="n">ldFlags</span><span class="o">.</span><span class="na">add</span><span class="o">(</span><span class="s2">""</span><span class="o">)</span>
        <span class="n">toolchain</span> <span class="o">=</span> <span class="s2">"clang"</span>
        <span class="n">toolchainVersion</span> <span class="o">=</span> <span class="s2">"3.9"</span>
        <span class="n">abiFilters</span><span class="o">.</span><span class="na">add</span><span class="o">(</span><span class="s2">"x86"</span><span class="o">)</span>
        <span class="n">CFlags</span><span class="o">.</span><span class="na">add</span><span class="o">(</span><span class="s2">""</span><span class="o">)</span>
        <span class="n">cppFlags</span><span class="o">.</span><span class="na">add</span><span class="o">(</span><span class="s2">""</span><span class="o">)</span>
        <span class="n">debuggable</span> <span class="o">=</span> <span class="kc">false</span>
        <span class="n">renderscriptNdkMode</span> <span class="o">=</span> <span class="kc">false</span>
        <span class="n">stl</span> <span class="o">=</span> <span class="s2">"system"</span>
        <span class="n">platformVersion</span> <span class="o">=</span> <span class="mi">15</span>
    <span class="o">}</span>
</code></pre></div></div>

<p>Since 0.7.0, you can also add ABI-specific configurations:</p>

<div class="language-gradle highlighter-rouge"><div class="highlight"><pre class="highlight"><code>    <span class="n">android</span><span class="o">.</span><span class="na">abis</span> <span class="o">{</span>
        <span class="n">create</span><span class="o">(</span><span class="s2">"x86"</span><span class="o">)</span> <span class="o">{</span>
            <span class="n">cppFlags</span><span class="o">.</span><span class="na">add</span><span class="o">(</span><span class="s1">'-DENABLE_SSSE3'</span><span class="o">)</span>
            <span class="n">ldLibs</span><span class="o">.</span><span class="na">add</span><span class="o">(</span><span class="s1">''</span><span class="o">)</span>
            <span class="n">ldFlags</span><span class="o">(</span><span class="s1">''</span><span class="o">)</span>
        <span class="o">}</span>
        <span class="n">create</span><span class="o">(</span><span class="s2">"armeabi-v7a"</span><span class="o">)</span> <span class="o">{</span>
            <span class="n">cppFlags</span><span class="o">.</span><span class="na">addAll</span><span class="o">([</span><span class="s2">"-mhard-float"</span><span class="o">,</span> <span class="s2">"-D_NDK_MATH_NO_SOFTFP=1"</span><span class="o">,</span> <span class="s2">"-mfloat-abi=hard"</span><span class="o">])</span>
            <span class="n">ldLibs</span><span class="o">.</span><span class="na">add</span><span class="o">(</span><span class="s2">"m_hard"</span><span class="o">)</span>
            <span class="n">ldFlags</span><span class="o">.</span><span class="na">add</span><span class="o">(</span><span class="s2">"-Wl,--no-warn-mismatch"</span><span class="o">)</span>
        <span class="o">}</span>
    <span class="o">}</span>
</code></pre></div></div>

<h2 id="debugging-a-ndk-project">Debugging a NDK project</h2>

<p>In order to get the debug capabilities of AS, create and use a new Run/Debug configuration from the “Android Native” default. While it was possible to use GDB in Android Studio 1.3, now only the LLDB backend is available.</p>

<p><a href="http://ph0b.com/wp-content/uploads/2015/08/native-debug-config.png"><img src="http://ph0b.com/wp-content/uploads/2015/08/native-debug-config.png" alt="native-debug-config" /></a></p>

<p>Use it with your debug variant, which will have <em>ndk.debuggable</em> flag set to <em>true</em> by default.</p>

<h2 id="going-further-with-the-ndk-with-android-studio">Going further with the NDK with Android Studio</h2>

<p>Many advanced features, such as the ability to have dependencies between native libraries, reuse prebuilts, tune specific toolchain options and having dynamic version codes while still having a project in a good shape is a bit complex, as the gradle-experimental plugin is still undergoing a lot of improvements across versions.</p>

<h3 id="getting-the-app_platform-right">Getting the APP_PLATFORM right</h3>

<p>When you’re building a NDK module, the android platform you’re compiling it against is a quite important setting, as it basically determines the minimum platform your module will be guaranteed to run on.</p>

<p>With earlier versions than <em>gradle-experimental:0.3.0-alpha4</em>, the chosen platform was the one set as <em>compileSdkVersion</em>. Fortunately with subsequent releases, you can now set <em>android.ndk.platformVersion</em> independently, and you should make it the same as your minSdkVersion.</p>

<h3 id="using-external-libraries-and-separate-modules">Using external libraries and separate modules</h3>

<h4 id="with-sources">with sources</h4>

<p>If you have access to your 3rd party libraries source code, you can embed it into your project and make it statically compile with your code.</p>

<p>There is an example of this with the native_app_glue library from the NDK, inside the <a href="https://github.com/googlesamples/android-ndk/blob/229cbe86238d401bb06166b8dfadec8198532589/native-activity/app/build.gradle#L22">native-activity sample</a>. For example, you can copy the library sources inside a subfolder inside your <em>jni</em> folder and add a reference to its directory so the includes are properly resolved:</p>

<div class="language-gradle highlighter-rouge"><div class="highlight"><pre class="highlight"><code>    <span class="n">android</span><span class="o">.</span><span class="na">ndk</span> <span class="o">{</span>
        <span class="c1">//...</span>
        <span class="n">cppFlags</span><span class="o">.</span><span class="na">add</span><span class="o">(</span><span class="s1">'-I'</span> <span class="o">+</span> <span class="n">file</span><span class="o">(</span><span class="s2">"src/main/jni/native_app_glue"</span><span class="o">))</span>
    <span class="o">}</span>
</code></pre></div></div>

<h4 id="with-sources-in-different-modules">with sources in different modules</h4>

<p>Now from 0.6.0-alpha7 version, you can finally have clean dependencies between native libraries, by setting the dependency on another module from your model:</p>

<div class="language-gradle highlighter-rouge"><div class="highlight"><pre class="highlight"><code>    <span class="n">android</span><span class="o">.</span><span class="na">sources</span> <span class="o">{</span>
        <span class="n">main</span> <span class="o">{</span>
            <span class="n">jni</span> <span class="o">{</span>
                <span class="k">dependencies</span> <span class="o">{</span>
                    <span class="n">project</span> <span class="s2">":yourlib"</span> <span class="n">buildType</span> <span class="s2">"release"</span> <span class="n">productFlavor</span> <span class="s2">"flavor1"</span> <span class="n">linkage</span> <span class="s2">"shared"</span>
                <span class="o">}</span>
            <span class="o">}</span>
        <span class="o">}</span>
    <span class="o">}</span>
</code></pre></div></div>

<p>In order to keep debugging working, you may have to edit your app-native run configuration, to add <strong>/build/intermediates/binaries/release/obj/[abi]</strong> to the symbol directories.</p>

<h4 id="with-native-prebuilts">with native prebuilts</h4>

<p>This technique works with static and shared prebuilts too! Inside your model, you’ll have to add a “lib repository”:</p>

<div class="language-gradle highlighter-rouge"><div class="highlight"><pre class="highlight"><code>    <span class="k">repositories</span> <span class="o">{</span>
        <span class="n">libs</span><span class="o">(</span><span class="n">PrebuiltLibraries</span><span class="o">)</span> <span class="o">{</span>
            <span class="n">yourlib</span> <span class="o">{</span>
                <span class="n">headers</span><span class="o">.</span><span class="na">srcDir</span> <span class="s2">"src/main/jni/prebuilts/include"</span>
                <span class="n">binaries</span><span class="o">.</span><span class="na">withType</span><span class="o">(</span><span class="n">SharedLibraryBinary</span><span class="o">)</span> <span class="o">{</span>
                    <span class="n">sharedLibraryFile</span> <span class="o">=</span> <span class="n">file</span><span class="o">(</span><span class="s2">"src/main/jni/prebuilts/${targetPlatform.getName()}/libyourlib.so"</span><span class="o">)</span>
                <span class="o">}</span>
            <span class="o">}</span>
        <span class="o">}</span>
    <span class="o">}</span>
</code></pre></div></div>

<p>And declare the dependency on this library:</p>

<div class="language-gradle highlighter-rouge"><div class="highlight"><pre class="highlight"><code>    <span class="n">android</span><span class="o">.</span><span class="na">sources</span> <span class="o">{</span>
        <span class="n">main</span> <span class="o">{</span>
            <span class="n">jni</span> <span class="o">{</span>
                <span class="k">dependencies</span> <span class="o">{</span>
                    <span class="n">library</span> <span class="s2">"yourlib"</span> <span class="n">linkage</span> <span class="s2">"shared"</span> 
                <span class="o">}</span>
            <span class="o">}</span>
        <span class="o">}</span>
    <span class="o">}</span>
</code></pre></div></div>

<p>Shared linkage is the default, but of course you can use static prebuilts by using a static linkage, and declaring StaticLibraryBinary/staticLibraryFile variables.</p>

<p>When having dependencies on shared libraries, you need to make sure to integrate these libs inside your APK. It will be the case if they’re under <em>jniLibs</em>, otherwise you can add them manually:</p>

<div class="language-gradle highlighter-rouge"><div class="highlight"><pre class="highlight"><code>    <span class="n">android</span><span class="o">.</span><span class="na">sources</span> <span class="o">{</span>
        <span class="n">main</span> <span class="o">{</span>
            <span class="n">jniLibs</span> <span class="o">{</span>
                <span class="n">source</span> <span class="o">{</span>
                    <span class="n">srcDir</span> <span class="s2">"src/main/jni/prebuilts"</span>
                <span class="o">}</span>
            <span class="o">}</span>
        <span class="o">}</span>
    <span class="o">}</span>
</code></pre></div></div>

<h3 id="multiple-apks">Multiple APKs</h3>

<p>When you publish multiple APKs (per architecture, per density, etc), you have to give them different version Version Codes. I couldn’t find a way to do it with the current DSL, neither when using splits or abiFilters and flavors. If you do see a way, plese contact me and I’ll add it there. For now, I would advise to go back using the <a href="http://ph0b.com/android-studio-gradle-and-ndk-integration/">stable gradle plugin</a>.</p>

<p>The good news is you can mix use of the stable gradle plugin, and the new experimental one, even while keeping debug features working! Please follow <a href="https://gist.github.com/ph0b/0575b30b67e04f2ec10f">this gist</a>.</p>

<p><a name="usingndkbuild"></a></p>

<h3 id="using-androidmkapplicationmk">Using Android.mk/Application.mk</h3>

<p>If the built-in gradle support isn’t suitable to your needs, you can get rid of it, while keeping the goodness of Android Studio C++ editing.</p>

<p>Declare a module that correctly represents your configuration, as this will help AS to correctly resolve all the symbols you’re using and keep the editing capabilities:</p>

<div class="language-gradle highlighter-rouge"><div class="highlight"><pre class="highlight"><code><span class="n">android</span><span class="o">.</span><span class="na">ndk</span> <span class="o">{</span> <span class="c1">// keeping it to make AS correctly support C++ code editing</span>
        <span class="n">moduleName</span> <span class="s2">"mymodule"</span>
        <span class="n">ldLibs</span><span class="o">.</span><span class="na">add</span><span class="o">(</span><span class="s1">'log'</span><span class="o">)</span>
        <span class="n">cppFlags</span><span class="o">.</span><span class="na">add</span><span class="o">(</span><span class="s1">'-std=c++11'</span><span class="o">)</span>
        <span class="n">cppFlags</span><span class="o">.</span><span class="na">add</span><span class="o">(</span><span class="s1">'-fexceptions'</span><span class="o">)</span>
        <span class="n">cppFlags</span><span class="o">.</span><span class="na">add</span><span class="o">(</span><span class="s1">'-I'</span> <span class="o">+</span> <span class="n">file</span><span class="o">(</span><span class="s2">"src/main/jni/prebuilts/include"</span><span class="o">))</span>
        <span class="n">stl</span> <span class="o">=</span> <span class="s1">'gnustl_shared'</span>
    <span class="o">}</span>
</code></pre></div></div>

<p>Then, set the <em>jniLibs</em> location to <em>libs</em>, the default directory in which <em>ndk-build</em> will put the generated libs, and deactivate built-in compilation tasks:</p>

<div class="language-gradle highlighter-rouge"><div class="highlight"><pre class="highlight"><code><span class="n">model</span> <span class="o">{</span>
    <span class="c1">//...</span>
    <span class="n">android</span><span class="o">.</span><span class="na">sources</span> <span class="o">{</span>
        <span class="n">main</span> <span class="o">{</span>
          <span class="n">jniLibs</span> <span class="o">{</span>
            <span class="n">source</span> <span class="o">{</span>
                <span class="n">srcDir</span> <span class="s1">'src/main/libs'</span>
            <span class="o">}</span>
        <span class="o">}</span>
    <span class="o">}</span>
<span class="o">}</span>

<span class="n">tasks</span><span class="o">.</span><span class="na">all</span> <span class="o">{</span>
    <span class="n">task</span> <span class="o">-&gt;</span>
    <span class="k">if</span> <span class="o">(</span><span class="n">task</span><span class="o">.</span><span class="na">name</span><span class="o">.</span><span class="na">startsWith</span><span class="o">(</span><span class="s1">'compile'</span><span class="o">)</span> <span class="o">&amp;&amp;</span> <span class="n">task</span><span class="o">.</span><span class="na">name</span><span class="o">.</span><span class="na">contains</span><span class="o">(</span><span class="s1">'MainC'</span><span class="o">))</span> <span class="o">{</span>
        <span class="n">task</span><span class="o">.</span><span class="na">enabled</span> <span class="o">=</span> <span class="kc">false</span>
    <span class="o">}</span>
    <span class="k">if</span> <span class="o">(</span><span class="n">task</span><span class="o">.</span><span class="na">name</span><span class="o">.</span><span class="na">startsWith</span><span class="o">(</span><span class="s1">'link'</span><span class="o">))</span> <span class="o">{</span>
        <span class="n">task</span><span class="o">.</span><span class="na">enabled</span> <span class="o">=</span> <span class="kc">false</span>
    <span class="o">}</span>
<span class="o">}</span>
</code></pre></div></div>

<p><em>Thanks to <a href="http://stackoverflow.com/questions/32594682/how-do-we-define-multiple-modules-with-the-new-ndk-gradle-based-builder/32640943#32640943">Alex Cohn</a> and Vitaly Dyadyuk who shared this technique to disable compilation tasks.</em></p>

<p>This way, you can call <em>ndk-build(.cmd)</em> yourself from the root of your src/main directory. ndk-build will use your usual <em>Android.mk</em>/<em>Application.mk</em> files under the <em>jni</em> folder, your libs will be generated inside <em>libs/&lt;ABI&gt;</em> as usual and get included inside your APK.</p>

<p>You can also add the call to <em>ndk-build</em> in your gradle configuration so it’s done automatically:</p>

<div class="language-gradle highlighter-rouge"><div class="highlight"><pre class="highlight"><code><span class="kn">import</span> <span class="nn">org.apache.tools.ant.taskdefs.condition.Os</span>

<span class="n">model</span> <span class="o">{</span>
    <span class="c1">//...</span>
    <span class="n">android</span><span class="o">.</span><span class="na">sources</span> <span class="o">{</span>
        <span class="n">main</span> <span class="o">{</span>
          <span class="n">jniLibs</span> <span class="o">{</span>
            <span class="n">source</span> <span class="o">{</span>
                <span class="n">srcDir</span> <span class="s1">'src/main/libs'</span>
            <span class="o">}</span>
        <span class="o">}</span>
    <span class="o">}</span>
<span class="o">}</span>

<span class="c1">// call regular ndk-build(.cmd) script from app directory</span>
<span class="n">task</span> <span class="nf">ndkBuild</span><span class="o">(</span><span class="nl">type:</span> <span class="n">Exec</span><span class="o">)</span> <span class="o">{</span>
    <span class="k">if</span> <span class="o">(</span><span class="n">Os</span><span class="o">.</span><span class="na">isFamily</span><span class="o">(</span><span class="n">Os</span><span class="o">.</span><span class="na">FAMILY_WINDOWS</span><span class="o">))</span> <span class="o">{</span>
        <span class="n">commandLine</span> <span class="s1">'ndk-build.cmd'</span><span class="o">,</span> <span class="s1">'-C'</span><span class="o">,</span> <span class="n">file</span><span class="o">(</span><span class="s1">'src/main'</span><span class="o">).</span><span class="na">absolutePath</span>
    <span class="o">}</span> <span class="k">else</span> <span class="o">{</span>
        <span class="n">commandLine</span> <span class="s1">'ndk-build'</span><span class="o">,</span> <span class="s1">'-C'</span><span class="o">,</span> <span class="n">file</span><span class="o">(</span><span class="s1">'src/main'</span><span class="o">).</span><span class="na">absolutePath</span>
    <span class="o">}</span>
<span class="o">}</span>

<span class="n">tasks</span><span class="o">.</span><span class="na">all</span> <span class="o">{</span>
    <span class="n">task</span> <span class="o">-&gt;</span>
    <span class="k">if</span> <span class="o">(</span><span class="n">task</span><span class="o">.</span><span class="na">name</span><span class="o">.</span><span class="na">startsWith</span><span class="o">(</span><span class="s1">'compile'</span><span class="o">)</span> <span class="o">&amp;&amp;</span> <span class="n">task</span><span class="o">.</span><span class="na">name</span><span class="o">.</span><span class="na">contains</span><span class="o">(</span><span class="s1">'MainC'</span><span class="o">))</span> <span class="o">{</span>
        <span class="n">task</span><span class="o">.</span><span class="na">enabled</span> <span class="o">=</span> <span class="kc">false</span>
    <span class="o">}</span>
    <span class="k">if</span> <span class="o">(</span><span class="n">task</span><span class="o">.</span><span class="na">name</span><span class="o">.</span><span class="na">startsWith</span><span class="o">(</span><span class="s1">'link'</span><span class="o">))</span> <span class="o">{</span>
        <span class="n">task</span><span class="o">.</span><span class="na">enabled</span> <span class="o">=</span> <span class="kc">false</span>
    <span class="o">}</span>
    <span class="k">if</span> <span class="o">(</span><span class="n">task</span><span class="o">.</span><span class="na">name</span><span class="o">.</span><span class="na">endsWith</span><span class="o">(</span><span class="s1">'SharedLibrary'</span><span class="o">)</span> <span class="o">)</span> <span class="o">{</span>
        <span class="n">task</span><span class="o">.</span><span class="na">dependsOn</span> <span class="n">ndkBuild</span>
    <span class="o">}</span>
<span class="o">}</span>
</code></pre></div></div>

<h2 id="additional-resources">Additional Resources</h2>

<ul>
  <li><a href="https://github.com/googlesamples/android-ndk">official samples</a></li>
  <li><a href="http://tools.android.com/tech-docs/new-build-system/gradle-experimental">gradle-experimental user guide</a></li>
  <li>Important bugs that may hit you:
    <ul>
      <li><a href="https://code.google.com/p/android/issues/detail?id=195483">Android Studio cannot find jni.h, but compilation still works</a> (ETA: Android Studio 2.2)</li>
      <li><a href="https://code.google.com/p/android/issues/detail?id=195135">ndk.platformVersion &lt; 21 prevents generating 64-bit libs</a> (ETA: Android Studio 2.2)</li>
      <li><a href="https://code.google.com/p/android/issues/detail?id=192943">can’t dynamically modify APKs versionCodes with gradle-experimental plugin</a> (No ETA)</li>
      <li><a href="https://code.google.com/p/android/issues/detail?id=94805">adding lint checks for incoherent inclusion of .so files</a> (No ETA)</li>
    </ul>
  </li>
</ul>]]></content><author><name>Xavier Hallade</name></author><category term="Android" /><category term="Android" /><category term="Android Build System" /><category term="Android Studio" /><category term="gradle" /><category term="NDK" /><summary type="html"><![CDATA[During Google I/O 2015, end of May, Google announced a new support for the NDK by Android Studio 1.3, integrating Jetbrains CLion capabilities, and the Android gradle plugin. This support has been released only in July, and while it’s really promising, it’s still in heavy development.]]></summary></entry><entry><title type="html">What you should know about .so files</title><link href="https://ph0b.com/android-abis-and-so-files/" rel="alternate" type="text/html" title="What you should know about .so files" /><published>2015-06-30T13:23:50+00:00</published><updated>2015-06-30T13:23:50+00:00</updated><id>https://ph0b.com/android-abis-and-so-files</id><content type="html" xml:base="https://ph0b.com/android-abis-and-so-files/"><![CDATA[<p>In its early days, the Android OS was pretty much supporting only one CPU architecture: ARMv5.<br />
Do you know how many it does support now? … <strong>7</strong>!</p>

<p>Seven distinct CPU-architectures are currently supported by the Android OS: <em>ARMv5</em>, <em>ARMv7</em> (since <strong>2010</strong>), <em>x86</em> (<strong>2011</strong>), <em>MIPS</em> (<strong>2012</strong>), <em>ARMv8</em>, <em>MIPS64</em> and <em>x86_64</em> (<strong>2014</strong>). Each of them is associated with a respective <strong>ABI</strong>.</p>

<p>An <strong>A</strong>pplication <strong>B</strong>inary <strong>I</strong>nterface is the definition of how binaries (esp. <em>.so files</em>) should be made in order to work on the platform, from the instruction set used and memory alignment, to the system libraries that are available. On Android there is one per CPU architecture:  <em>armeabi</em>, <em>armeabi-v7a</em>, <em>x86, mips, arm64-v8a</em>, <em>mips64</em>, <em>x86_64</em>.</p>

<h2 id="why-should-you-care-about-so-files-in-the-first-place">Why should you care about .so files in the first place?</h2>

<p>If you’re using the NDK, you’re generating .so files, so you obviously already care. If you’re dealing only with Java code, you could think you don’t need to, as it’s cross-platform… but in fact, even in this case, quite often, you may rely without knowing it on libraries and engines that make your app embed <em>.so files</em> and become ABI-dependent/</p>

<p>Using the RenderScript support Library? OpenCV? Unity? android-gif-drawable? SQLCipher? You’ve got .so files inside your APK, and you need to care about these.</p>

<p>The ABIs supported by your Android application are determined by the presence of <em>.so files</em> inside your APK, under the “<strong>lib/&lt;ABI&gt;</strong>” folders where ABI can be one or more of <em>armeabi</em>, <em>armeabi-v7a</em>, <em>arm64-v8a</em>, <em>mips, mips64</em>, <em>x86</em>, <em>x86_64</em> (the current seven ABIs).</p>

<p><a href="/wp-content/uploads/2015/06/image00.png"><img src="/wp-content/uploads/2015/06/image00-1024x640.png" alt="Native Libs Monitor - screenshot" /></a><a href="https://play.google.com/store/apps/details?id=com.xh.nativelibsmonitor.app"><em>Native Libs Monitor</em></a> <em>can help you understanding what .so files are embedded inside your APK and installed on your device, and which libraries and frameworks they’re coming from.</em></p>

<p>Most devices are compatible with more than one ABI. For example, ARM64 devices and x86 devices can run <em>armeabi-v7a</em> and <em>armeabi</em> binaries too! But it’s always better to provide libraries compiled for the preferred ABI of the device. This way, libraries can run without an emulation layer (in case of arm libs on x86 devices), and get more performance thanks to the recent architecture improvements (hardware fpu, more registers, better vectorization, etc).</p>

<p>You can get the list of supported ABIs, sorted by preference, from <em>Build.SUPPORTED_ABIS</em>. But you shouldn’t need to read it from your app, as Android’s package manager will automatically install the <em>.so files</em> compiled for your device preferred ABI that are present inside your APK, if they’re properly present under <strong>lib/&lt;ABI&gt;</strong>.</p>

<h2 id="thats-where-things-may-go-wrong-for-your-app">That’s where things may go wrong for your app!</h2>

<p>There is a dead simple but not well-known important rule to follow when dealing with .so files.</p>

<p>You should provide libraries optimized for each ABIs if possible, but it’s all in or nothing: <strong>you shall not mix</strong>. You have to provide the full set of the libraries you’re using in each ABI folder.</p>

<p>When an application is installed on a device, only the <em>.so files</em> from <strong>one</strong> of its supported architectures are getting installed. On x86 devices, that can be the libs from the x86 folder if there is one, else from the armeabi-v7a, else armeabi folder (yes, x86 devices support these too).</p>

<h2 id="but-they-may-go-wrong-in-many-other-ways-too">But they may go wrong in many other ways too…</h2>

<p>When you include a .so file, not only the architecture matters. Here is a list of really common mistakes I see from other developers, that are leading to “UnsatisfiedLinkError”, “dlopen: failed”, and other crashes or bad performance:</p>

<h3 id="using-a-so-file-that-has-been-compiled-against-android-21-platform-version-to-run-it-on-android-15-device-ouch"><strong>using a .so file that has been compiled against android-21+ platform version, to run it on android-15 device. Ouch.</strong></h3>

<p>When using the NDK, you may be tempted to “compile against the latest platform”, but it’s in fact quite wrong as ndk platforms aren’t backward compatible, they’re forward compatible! Use the same platform level than your app’s <em>minSdkVersion</em>.</p>

<p>That means that when you’re including a .so file that has already been compiled, you have to check the version it has been made to run on.</p>

<h3 id="mixing-so-files-that-are-using-different-c-runtimes"><strong>mixing .so files that are using different C++ runtimes</strong></h3>

<p>.so files can rely on various C++ runtimes, statically compiled or dynamically loaded. Mixing versions of C++ runtimes can lead to many weird crashes and should be avoided. As a rule of thumb, when having only one .so file, it’s ok to statically compile a C++ runtime, else you should have them all dynamically linking the same C++ runtime.</p>

<p>That means that when you’re including a .so file that has already been compiled and you already have some of them, you have to check the C++ runtime it’s using.</p>

<h3 id="not-providing-all-the-libs-for-each-of-the-supported-platforms"><strong>not providing all the libs for each of the supported platforms</strong></h3>

<p>This was already previously described, but you should really pay attention to this, as it may happen behind your back.</p>

<p>Example: You have an Android app with .so files for armeabi-v7a and x86 architectures. Then you add a dependency on another library that embeds .so files and supports more architectures, as android-gif-drawable: <em>compile ‘pl.droidsonroids.gif:android-gif-drawable:1.1.+’</em>.</p>

<p>Release your app, and then you’ll see it crashing on some devices, like the Galaxy S6, because only the .so files from the 64-bit directory got installed.</p>

<p>Solution: recompile your libs to support the missing ABIs, or set <em>ndk.abiFilters</em> to the one you support.</p>

<p>One more thing: <strong>If you’re a library provider, and you’re not supporting all the ABIs, you’re screwing up your customers, as they can’t support more ABIs than you do.</strong></p>

<h3 id="putting-so-files-in-the-wrong-place">putting .so files in the wrong place</h3>

<p>It’s easy to get confused on where .so files should be put or generated by default, here is a summary:</p>

<ul>
  <li><strong>jniLibs/ABI</strong> inside an Android Studio project (can be changed using <em>jniLibs.srcDir</em> property)</li>
  <li><strong>libs/ABI</strong> inside an eclipse project (that’s where ndk-build generates libs by default too)</li>
  <li><strong>jni/ABI</strong> inside an AAR (the libs will get automatically included in the APK that references the AAR).</li>
  <li><strong>lib/ABI</strong> inside the final APK</li>
  <li>inside the app’s <strong>nativeLibraryPath</strong> on a &lt;5.0 device / <strong>nativeLibraryRootDir/CPU_ARCH</strong> on a &gt;=5.0 device (done by PackageManager during app installation)</li>
</ul>

<h3 id="providing-only-armeabi-libs-and-ignoring-all-the-other-abis"><strong>providing only armeabi libs and ignoring all the other ABIs</strong></h3>

<p>armeabi is supported by all the x86/x86_64/armeabi-v7a/arm64-v8a devices, so that may look like a good trick to remove all the other ABIs to generate a light APK. But it’s not: there is an impact on performance and compatibility, and not only for the library itself.</p>

<p>x86 devices can run ARM libraries quite well, but it’s not 100% crash proof, particularly on the older devices. 64-bit devices (arm64-v8a, x86_64, mips64) can all run 32-bit libraries, but they do so in 32-bit mode, running a 32-bit version of ART and Android components, loosing the 64-bit performance improvements that have been made on the 64-bit version of ART, webview, media…</p>

<p>Reducing APK’s weight is in any case a false excuse, as you can upload distinct ABI-dependent APKs to the Play Store (for the same app entry, of course). You only have to switch to advanced mode and upload your APKs with different ABI support and versionCodes. Generating these APKs is as simple as adding this to your build.gradle:</p>

<div class="language-gradle highlighter-rouge"><div class="highlight"><pre class="highlight"><code><span class="n">android</span> <span class="o">{</span>
    <span class="o">...</span> 
    <span class="n">splits</span> <span class="o">{</span>
        <span class="n">abi</span> <span class="o">{</span>
            <span class="n">enable</span> <span class="kc">true</span>
            <span class="nf">reset</span><span class="o">()</span>
            <span class="n">include</span> <span class="s1">'x86'</span><span class="o">,</span> <span class="s1">'x86_64'</span><span class="o">,</span> <span class="s1">'armeabi-v7a'</span><span class="o">,</span> <span class="s1">'arm64-v8a'</span> <span class="c1">//select ABIs to build APKs for</span>
            <span class="n">universalApk</span> <span class="kc">true</span> <span class="c1">//generate an additional APK that contains all the ABIs</span>
        <span class="o">}</span>
    <span class="o">}</span>
 
    <span class="c1">// map for the version code</span>
    <span class="n">project</span><span class="o">.</span><span class="na">ext</span><span class="o">.</span><span class="na">versionCodes</span> <span class="o">=</span> <span class="o">[</span><span class="s1">'armeabi'</span><span class="o">:</span> <span class="mi">1</span><span class="o">,</span> <span class="s1">'armeabi-v7a'</span><span class="o">:</span> <span class="mi">2</span><span class="o">,</span> <span class="s1">'arm64-v8a'</span><span class="o">:</span> <span class="mi">3</span><span class="o">,</span> <span class="s1">'mips'</span><span class="o">:</span> <span class="mi">5</span><span class="o">,</span> <span class="s1">'mips64'</span><span class="o">:</span> <span class="mi">6</span><span class="o">,</span> <span class="s1">'x86'</span><span class="o">:</span> <span class="mi">8</span><span class="o">,</span> <span class="s1">'x86_64'</span><span class="o">:</span> <span class="mi">9</span><span class="o">]</span>
 
    <span class="n">android</span><span class="o">.</span><span class="na">applicationVariants</span><span class="o">.</span><span class="na">all</span> <span class="o">{</span> <span class="n">variant</span> <span class="o">-&gt;</span>
        <span class="c1">// assign different version code for each output</span>
        <span class="n">variant</span><span class="o">.</span><span class="na">outputs</span><span class="o">.</span><span class="na">each</span> <span class="o">{</span> <span class="n">output</span> <span class="o">-&gt;</span>
            <span class="n">output</span><span class="o">.</span><span class="na">versionCodeOverride</span> <span class="o">=</span>
                    <span class="n">project</span><span class="o">.</span><span class="na">ext</span><span class="o">.</span><span class="na">versionCodes</span><span class="o">.</span><span class="na">get</span><span class="o">(</span><span class="n">output</span><span class="o">.</span><span class="na">getFilter</span><span class="o">(</span><span class="n">com</span><span class="o">.</span><span class="na">android</span><span class="o">.</span><span class="na">build</span><span class="o">.</span><span class="na">OutputFile</span><span class="o">.</span><span class="na">ABI</span><span class="o">),</span> <span class="mi">0</span><span class="o">)</span> <span class="o">*</span> <span class="mi">1000000</span> <span class="o">+</span> <span class="n">android</span><span class="o">.</span><span class="na">defaultConfig</span><span class="o">.</span><span class="na">versionCode</span>
        <span class="o">}</span>
    <span class="o">}</span>
 <span class="o">}</span>
</code></pre></div></div>

<h3 id="using-private-system-libraries">Using private system libraries</h3>

<p>The libraries you can use are the ones which are part of the NDK ones. Any other lib isn’t guaranteed to work across devices and may trigger crashes starting with Android N: https://developer.android.com/preview/behavior-changes.html#ndk</p>

<p>TL;DR:</p>

<p><a href="/wp-content/uploads/2015/06/nnhuh.jpg"><img src="/wp-content/uploads/2015/06/nnhuh.jpg" alt="One does not simply include random libs and .so files inside an android app." /></a></p>]]></content><author><name>Xavier Hallade</name></author><category term="Android" /><category term="Android" /><category term="NDK" /><summary type="html"><![CDATA[In its early days, the Android OS was pretty much supporting only one CPU architecture: ARMv5. Do you know how many it does support now? … 7!]]></summary></entry><entry><title type="html">Getting Battery Historian 2.0 to work on Windows</title><link href="https://ph0b.com/battery-historian-2-0-windows/" rel="alternate" type="text/html" title="Getting Battery Historian 2.0 to work on Windows" /><published>2015-06-08T16:35:41+00:00</published><updated>2015-06-08T16:35:41+00:00</updated><id>https://ph0b.com/battery-historian-2-0-windows</id><content type="html" xml:base="https://ph0b.com/battery-historian-2-0-windows/"><![CDATA[<p><strong>Last updated on 3/25/16</strong></p>

<p>If you’ve never heard about Battery Historian, you can first have a look at the <a href="https://github.com/google/battery-historian">official page</a> and some of <a href="https://www.youtube.com/watch?v=4D7_N2XEw20">Android Performance Patterns videos</a>. Then, come back here if you’re using Windows, to get ready fixing your app 🙂</p>

<p>The first version of Battery Historian released last year was a simple cross-platform Python script. Two weeks ago, during Google I/O 15, a new version of Battery Historian (2.0!) has been quietly released.</p>

<p>This new release brings a lot of welcome improvements: more clarity in the reports, per-app summaries, a quicker execution, the presence of a Readme, etc.</p>

<p>While all these new features are awesome, Battery Historian got more complicated to install because of the addition of many dependencies and all its documentation and internal scripts are written for Unix compatible systems (Linux and Mac OSX). So out of the box, it’s simply not working on Windows.</p>

<p>Last week, I held a talk at Droidcon Berlin on power optimization for Android, and I’ve made a quick poll to the audience: 30-40% were actually developing on Windows (me included, 50%+ of the time).</p>

<p>So if you’re an Android developer who is developing on Windows, let me make you gain some time, here is my short guide on how to install Battery Historian 2.0 on Windows:</p>

<h2 id="1-installing-the-dependencies">1. Installing the dependencies</h2>

<h3 id="git">Git</h3>

<p>While you may already have some version of git installed on your system, it will be easier if you get the official client and make it available to Windows Command Prompt. In order to do so, download <a href="http://git-scm.com/download/win">git’s latest version</a> and trigger its installation.</p>

<p>When you get the chance to do it, do not forget to pick “Use Git from the Windows Command Prompt” :<br />
<a href="/wp-content/uploads/2015/06/battery-historian-1.png"><img src="/wp-content/uploads/2015/06/battery-historian-1.png" alt="select Use Git from the Windows Command Prompt" /></a></p>

<h3 id="python">Python</h3>

<p>Battery Historian <strong>1.0</strong> requires Python <strong>2.7</strong>, and Battery Historian <strong>2.0</strong> works with both Python <strong>2.7</strong> and <strong>3.0</strong> (with a small fix).<br />
If you want to be able to generate and look at 1.0 reports from Battery Historian 2.0 (the interface gives you this possibility – but it’s not that interesting in my view), use Python 2.7, else you’re free to choose Python 3.0.<br />
Download and trigger the installer of your choice from <a href="https://www.python.org/downloads/windows/">Python.org</a>.</p>

<h3 id="go">Go</h3>

<p>Battery Historian 2.0 has been rewritten in Go, so you need first to <a href="http://golang.org/doc/install">download and install</a> it.<br />
Once this is done, create a go workspace (ie. a directory):</p>

<div class="language-shell highlighter-rouge"><div class="highlight"><pre class="highlight"><code><span class="nb">mkdir</span> %USERPROFILE%<span class="se">\g</span>o-workspace
</code></pre></div></div>

<h2 id="2-installing-battery-historian-20">2. Installing Battery Historian 2.0</h2>

<p>Open a Windows Command Prompt (cmd) and set useful Go specific environment variables, then go into your Go workspace:</p>

<div class="language-shell highlighter-rouge"><div class="highlight"><pre class="highlight"><code><span class="nb">set </span><span class="nv">GOPATH</span><span class="o">=</span>%USERPROFILE%<span class="se">\g</span>o-workspace
<span class="nb">set </span><span class="nv">GOBIN</span><span class="o">=</span>%GOPATH%<span class="se">\b</span><span class="k">in
</span><span class="nb">set </span><span class="nv">PATH</span><span class="o">=</span>%PATH%<span class="p">;</span>%GOBIN%
<span class="nb">cd</span> %GOPATH%
</code></pre></div></div>

<p>Get the latest battery historian and install it:</p>

<div class="language-shell highlighter-rouge"><div class="highlight"><pre class="highlight"><code>go get <span class="nt">-u</span> github.com/google/battery-historian
<span class="nb">cd</span> %GOPATH%<span class="se">\s</span>rc<span class="se">\g</span>ithub.com<span class="se">\g</span>oogle<span class="se">\b</span>attery-historian
go run setup.go
</code></pre></div></div>

<p><em><strong>update from 3/25/16</strong>: Battery historian has been updated with a much improved support for Windows, so the following method isn’t required anymore:</em></p>

<p><del>Now get additional go dependencies (proto, protoc-gen-go) as well as Battery Historian, by executing:</del></p>

<div class="language-shell highlighter-rouge"><div class="highlight"><pre class="highlight"><code>go get <span class="nt">-u</span> github.com/golang/protobuf/proto
go get <span class="nt">-u</span> github.com/golang/protobuf/protoc-gen-go
go get <span class="nt">-u</span> github.com/google/battery-historian
</code></pre></div></div>

<p><del>Then you need to add closure library and compilers to battery historian. Go into battery-historian: <em>%GOPATH%\src\github.com\google\battery-historian</em> and create two directories: <em>third_party</em> and <em>compiled</em>.</del></p>

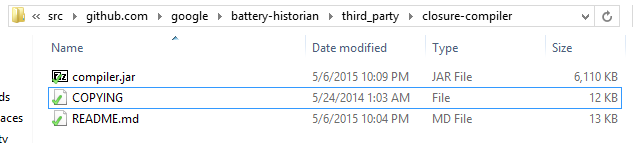
<p><del>Download the <a href="http://dl.google.com/closure-compiler/compiler-20150315.zip">Closure compiler</a> and unzip it inside <em>third_party\closure-compiler</em><br />
 <img src="/wp-content/uploads/2015/06/Capture.png" alt="Closure Compiler unziped" /></del></p>

<p><del>Clone the closure library to <em>third_party\closure-library</em></del></p>

<div class="language-shell highlighter-rouge"><div class="highlight"><pre class="highlight"><code>git clone https://github.com/google/closure-library third_party/closure-library
</code></pre></div></div>

<p><del>If you’re using Python 3, change the ligne 123 of <em>third_party/closure-library\closure\bin\build\source.py</em> from this library: (that fix has been upstreamed)</del></p>

<div class="language-diff highlighter-rouge"><div class="highlight"><pre class="highlight"><code><span class="gd">-    fileobj = open(path)
</span><span class="gi">+    fileobj = open(path, encoding="utf8")
</span></code></pre></div></div>

<p><del>While we’re editing sources, if you want the Battery Historian 1.0 tab to work from Battery Historian 2.0, change line 266 of <em>battery-historian\analyzer\analyzer.go</em> to add first the reference to your Python executable (python.exe is enough if the directory is part of your path):</del></p>

<div class="language-shell highlighter-rouge"><div class="highlight"><pre class="highlight"><code>-       cmd :<span class="o">=</span> exec.Command<span class="o">(</span><span class="s2">"./historian.py"</span>, <span class="s2">"-c"</span>, <span class="s2">"-m"</span>, <span class="s2">"-r"</span>, reportName, filepath<span class="o">)</span>
+       cmd :<span class="o">=</span> exec.Command<span class="o">(</span><span class="s2">"C:</span><span class="se">\\</span><span class="s2">Python27</span><span class="se">\\</span><span class="s2">python.exe"</span>, <span class="s2">"./historian.py"</span>, <span class="s2">"-c"</span>, <span class="s2">"-m"</span>, <span class="s2">"-r"</span>, reportName, filepath<span class="o">)</span>
</code></pre></div></div>

<p><del>Finally, to finish the installation of Battery Historian 2.0, execute these two commands from the <em>battery-historian</em> directory:</del></p>

<div class="language-shell highlighter-rouge"><div class="highlight"><pre class="highlight"><code>third_party<span class="se">\c</span>losure-library<span class="se">\c</span>losure<span class="se">\b</span><span class="k">in</span><span class="se">\b</span>uild<span class="se">\d</span>epswriter.py <span class="nt">--root</span><span class="o">=</span><span class="s2">"third_party</span><span class="se">\c</span><span class="s2">losure-library</span><span class="se">\c</span><span class="s2">losure</span><span class="se">\g</span><span class="s2">oog"</span> <span class="nt">--root_with_prefix</span><span class="o">=</span><span class="s2">"js ../../../../js"</span> <span class="o">&gt;</span> compiled<span class="se">\h</span>istorian_deps-runfiles.js

java <span class="nt">-jar</span> third_party<span class="se">\c</span>losure-compiler<span class="se">\c</span>ompiler.jar <span class="nt">--closure_entry_point</span> historian.Historian <span class="nt">--js</span> js<span class="se">\*</span>.js <span class="nt">--js</span> third_party<span class="se">\c</span>losure-library<span class="se">\c</span>losure<span class="se">\g</span>oog<span class="se">\b</span>ase.js <span class="nt">--js</span> third_party<span class="se">\c</span>losure-library<span class="se">\c</span>losure<span class="se">\g</span>oog<span class="se">\*</span><span class="k">*</span> <span class="nt">--only_closure_dependencies</span> <span class="nt">--generate_exports</span> <span class="nt">--js_output_file</span> compiled<span class="se">\h</span>istorian-optimized.js <span class="nt">--compilation_level</span> SIMPLE_OPTIMIZATIONS
</code></pre></div></div>

<h2 id="3-running-battery-historian-20">3. Running Battery Historian 2.0</h2>

<p>Now that you’ve went through all the installation steps, you can finally launch Battery Historian:</p>

<div class="language-shell highlighter-rouge"><div class="highlight"><pre class="highlight"><code><span class="nb">set </span><span class="nv">GOPATH</span><span class="o">=</span>%USERPROFILE%<span class="se">\g</span>o-workspace
<span class="nb">cd</span> %GOPATH%<span class="se">\s</span>rc<span class="se">\g</span>ithub.com<span class="se">\g</span>oogle<span class="se">\b</span>attery-historian
go run cmd<span class="se">\b</span>attery-historian<span class="se">\b</span>attery-historian.go
</code></pre></div></div>

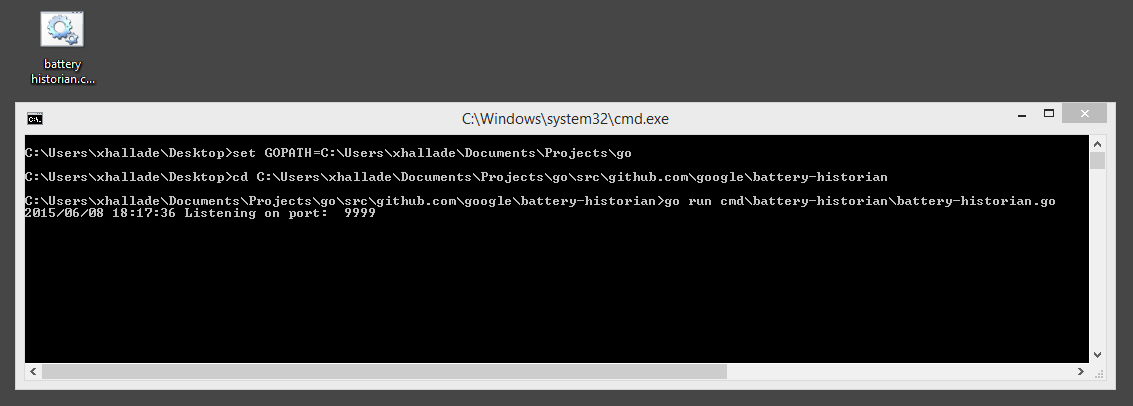
<p><em>Tip</em>: place these lines inside a <em>.cmd</em> file you’ll be able to double click on to launch Battery Historian.</p>

<p><a href="/wp-content/uploads/2015/06/Capture1.png"><img src="/wp-content/uploads/2015/06/Capture1-1024x367.png" alt="battery-historian.cmd" /></a></p>

<p>Go to <a href="http://localhost:9999">http://localhost:9999</a> and you should see your Battery Historian 2.0 local server up and running:</p>

<p><a href="/wp-content/uploads/2015/06/Capture2.png"><img src="/wp-content/uploads/2015/06/Capture2-300x156.png" alt="Battery Historian Server" /></a></p>

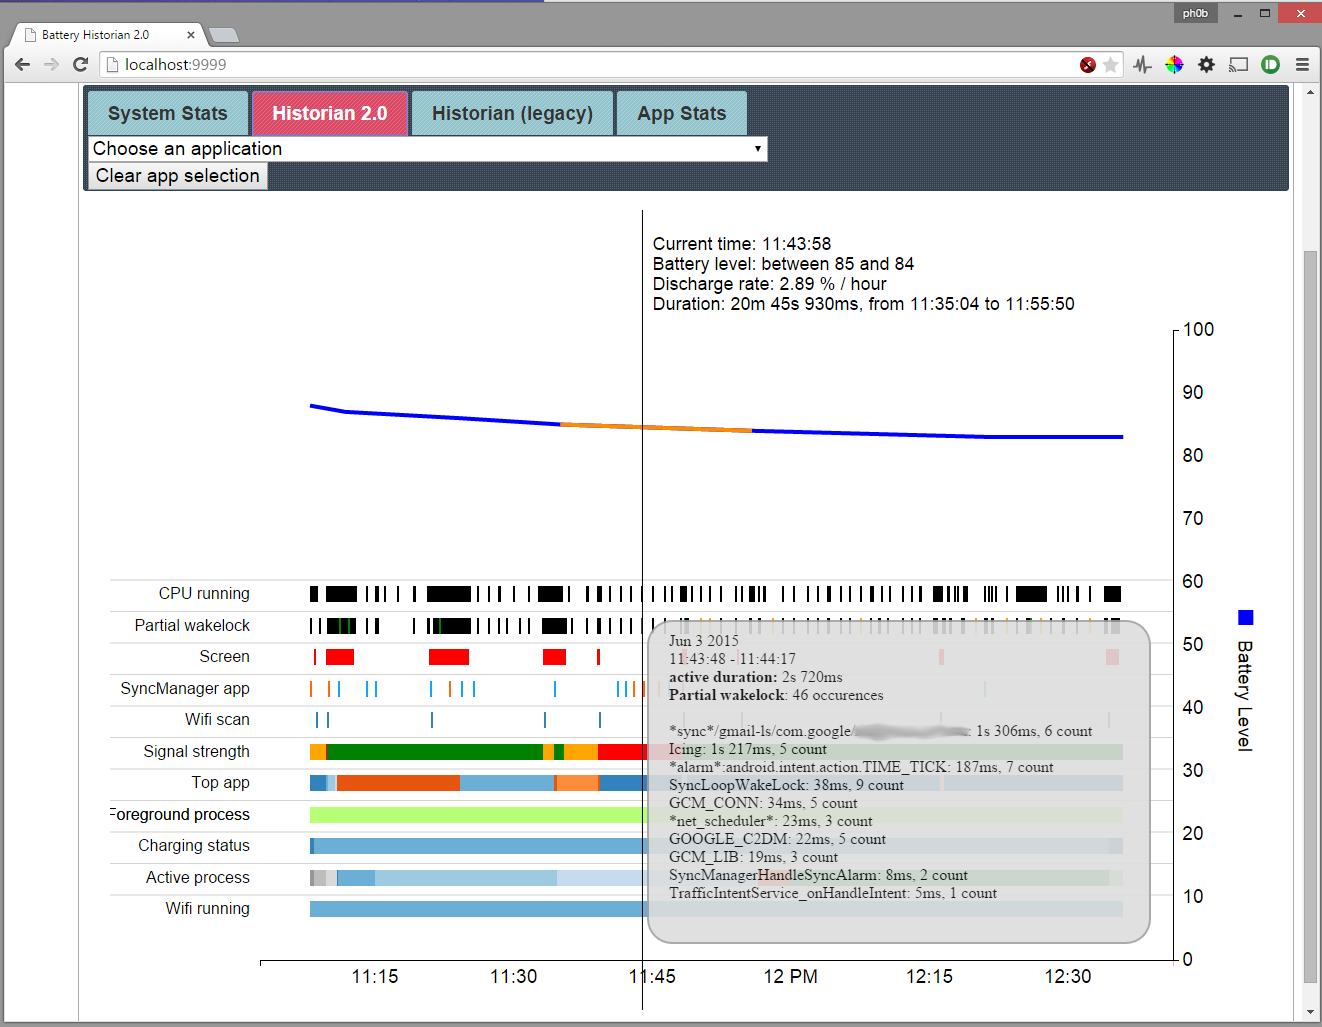
<p>Now you can upload a bugreport to it, and enjoy this tool on Windows!</p>

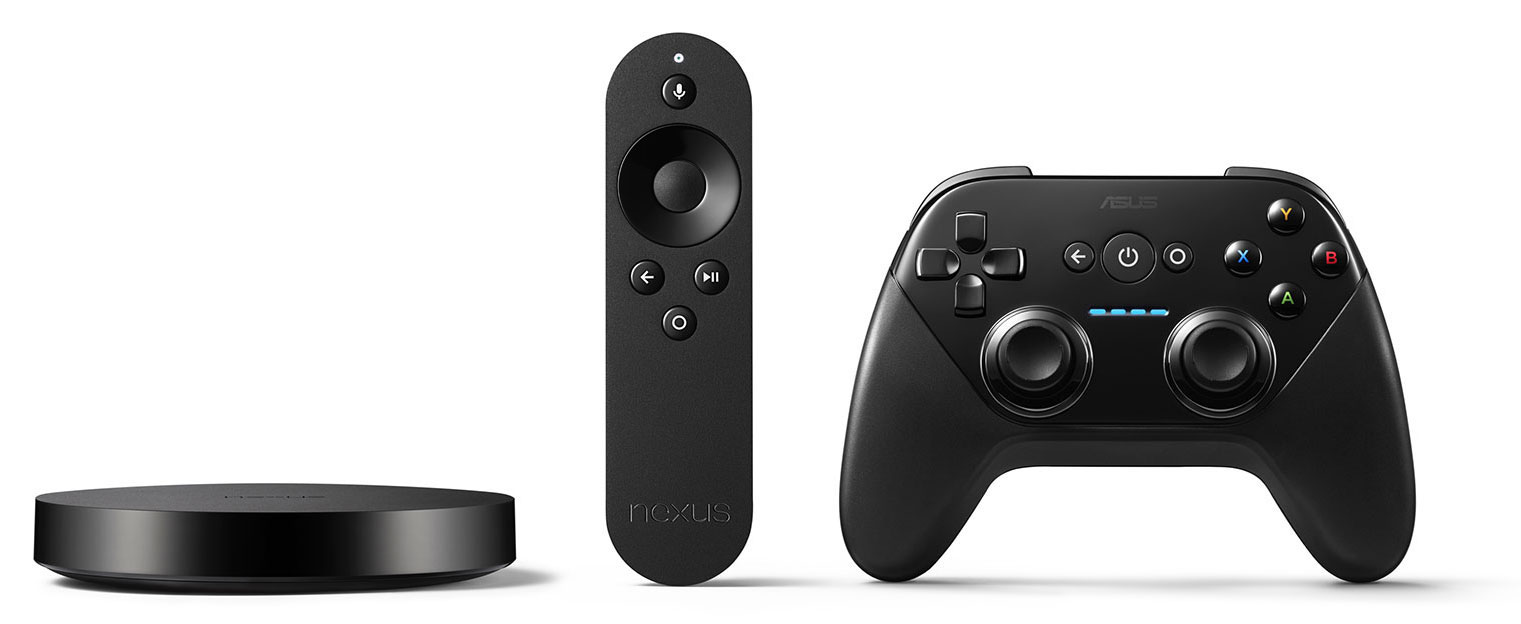
<p><a href="/wp-content/uploads/2015/06/Screenshot-5.png"><img src="/wp-content/uploads/2015/06/Screenshot-5-1024x795.png" alt="Battery Historian 2.0 report" /></a></p>]]></content><author><name>Xavier Hallade</name></author><category term="Android" /><category term="Android" /><category term="Battery Historian" /><category term="Windows" /><summary type="html"><![CDATA[Last updated on 3/25/16]]></summary></entry><entry><title type="html">Porting an Android app to Android TV and the Nexus Player</title><link href="https://ph0b.com/porting-android-app-android-tv-nexus-player/" rel="alternate" type="text/html" title="Porting an Android app to Android TV and the Nexus Player" /><published>2014-11-03T18:00:22+00:00</published><updated>2014-11-03T18:00:22+00:00</updated><id>https://ph0b.com/porting-android-app-android-tv-nexus-player</id><content type="html" xml:base="https://ph0b.com/porting-android-app-android-tv-nexus-player/"><![CDATA[<p>The <strong>Nexus Player</strong> is the <strong>Android TV</strong> <strong>Nexus</strong> device from Google.</p>

<p><a href="/wp-content/uploads/2014/11/player-overview-1600.jpg"><img src="/wp-content/uploads/2014/11/player-overview-1600.jpg" alt="Nexus Player" /></a></p>

<p>This device, made by Asus embeds 8GB memory, 1GB of ram, costs <strong>99$</strong> and features an <strong>Intel</strong>® SOC, the Atom Z3560 (codenamed Moorefield). That means it has got a <strong>4-cores</strong> <strong>64-bit</strong> Silvermont CPU clocked at <strong>1.83 Ghz</strong> and a <strong>PowerVR</strong> Series 6 GPU (<strong>G6430</strong>) that supports <strong>OpenGL ES 3.1</strong>.</p>

<p>Let’s look at how you can port your app to this device and Android TV in general.</p>

<h2 id="android-tv-requirements-for-applications">Android TV requirements for applications</h2>

<p>Simply said, If you want your application to be available for Android TV devices and visible from their launcher, you need to provide an activity that will handle the <em>action.Main</em> intent for the <em>LEANBACK_LAUNCHER</em> category, to integrate TV-specific assets, and to specify that your application doesn’t require a touchscreen.</p>

<p>These are the very basic requirements for an application to be installed and used on Android TV devices like the Nexus Player. Let’s look at how this works in practice and then how to adapt your application so it provides a good user experience on Android TV and the Nexus Player:</p>

<h3 id="declaring-an-activity-for-the-leanback-launcher-main-intent">Declaring an Activity for the Leanback Launcher Main intent</h3>

<p>Like a classic Android Launcher, the Android TV Launcher will look for the activity of your application that you declared as a target of the <em>android.intent.action.MAIN</em> intent.</p>

<p>But in the case of the Android TV Launcher, the category of the intent isn’t <em>android.intent.category.LAUNCHER</em> but <strong><em>android.intent.category.LEANBACK_LAUNCHER</em></strong>.</p>

<p>Here is how you should declare the Main Activity of your application for Android TV:</p>

<div class="language-xml highlighter-rouge"><div class="highlight"><pre class="highlight"><code><span class="nt">&lt;activity</span>
<span class="err">         </span>   <span class="na">android:name=</span><span class="s">".TvMainActivity"</span>
<span class="err">           </span> <span class="na">android:banner=</span><span class="s">"@drawable/ic_banner"</span>
<span class="err">           </span> <span class="na">android:theme=</span><span class="s">"@style/TvAppTheme"</span><span class="nt">&gt;</span>
            <span class="nt">&lt;intent-filter&gt;</span>
                <span class="nt">&lt;action</span> <span class="na">android:name=</span><span class="s">"android.intent.action.MAIN"</span> <span class="nt">/&gt;</span>
                <span class="nt">&lt;category</span> <span class="na">android:name=</span><span class="s">"android.intent.category.LEANBACK_LAUNCHER"</span> <span class="nt">/&gt;</span>
            <span class="nt">&lt;/intent-filter&gt;</span>
<span class="nt">&lt;/activity&gt;</span>
</code></pre></div></div>

<p><strong>Note:</strong> There are two categories of apps inside the Leanback Launcher -&gt; Apps and Games. If you want to appear among the Games, you need to set the <em>isGame</em> property of your application to true:</p>

<div class="language-xml highlighter-rouge"><div class="highlight"><pre class="highlight"><code><span class="nt">&lt;application</span>
  <span class="err">...</span>
  <span class="na">android:isGame=</span><span class="s">"true"</span>
  <span class="err">...</span><span class="nt">&gt;</span>
</code></pre></div></div>

<p>On top of the specific intent filter, that’s also in this activity <em>android:banner</em> property that you specify your application’s banner that will be displayed on the Launcher. You can set this banner inside your &lt;activity&gt; or inside your &lt;application&gt;</p>

<h3 id="the-banner">The banner</h3>

<p>The logo of your application that will be displayed on the launcher is the <em>android:banner</em> associated to your application or to the activity that accepts the Leanback Launcher intent. Here it’s the drawable we called ic_banner.</p>

<p>It has to be a 320x180px picture that you have to put inside your <em>drawable-xhdpi</em> resource folder. This pictures has to include the Name of your application, localized if needed, and have no alpha channel:</p>

<p><a href="/wp-content/uploads/2014/11/videos_by_google_banner.png"><img src="/wp-content/uploads/2014/11/videos_by_google_banner.png" alt="videos_by_google_banner" /></a></p>

<p>All this will allow your application to be seen and started from the Android TV launcher.</p>

<p>But For your application to be compatible with Android TV, you also need to support non-touchscreen Android devices and declare it:</p>

<h3 id="supporting-non-touchscreen-android-devices">Supporting non-touchscreen Android devices</h3>

<p>First, you need to implement support for D-pad navigation. Standard Android UI elements all support it, but in practice some simple adjustments may be needed:</p>

<h4 id="adjusting-initial-focus">Adjusting Initial Focus</h4>

<p>Adjust the element that will have the initial focus inside your view using <em>requestFocus()</em> from Java or <em>&lt;requestFocus /&gt;</em> from your xml layouts:</p>

<div class="language-xml highlighter-rouge"><div class="highlight"><pre class="highlight"><code><span class="nt">&lt;View</span> <span class="na">android:id=</span><span class="s">"@+id/my_view"</span> <span class="na">android:focusable=</span><span class="s">"true"</span> <span class="nt">&gt;</span>
      <span class="nt">&lt;requestFocus</span> <span class="nt">/&gt;</span>
<span class="nt">&lt;/View&gt;</span>
</code></pre></div></div>

<p>The <em>android:focusable</em> property may need to be set to true if you want the focus request to work when your view is inflated.</p>

<h4 id="adjusting-navigation-flow">Adjusting navigation flow</h4>

<p>Sometimes you may need to adjust the navigation within your view. You can choose where the focus is going from one element to another using <em>nextFocus</em> properties:</p>

<div class="language-xml highlighter-rouge"><div class="highlight"><pre class="highlight"><code><span class="nt">&lt;View</span> 
    <span class="na">android:nextFocusDown=</span><span class="s">"@id/bottom_view"</span>
    <span class="na">android:nextFocusUp=</span><span class="s">"@id/top_view"</span>
    <span class="na">android:nextFocusLeft=</span><span class="s">"@id/left_view"</span>
    <span class="na">android:nextFocusRight=</span><span class="s">"@id/right_view"</span>
<span class="nt">/&gt;</span>
</code></pre></div></div>

<h4 id="declaring-non-touchscreen-devices-support">Declaring non-touchscreen devices support</h4>

<p>Once D-pad navigation is working for you app, you can declare it inside your AndroidManifest.xml. Simply declare that the “touchscreen” feature isn’t required:</p>

<div class="language-xml highlighter-rouge"><div class="highlight"><pre class="highlight"><code><span class="nt">&lt;uses-feature</span>
    <span class="na">android:name=</span><span class="s">"android.hardware.touchscreen"</span>
    <span class="na">android:required=</span><span class="s">"false"</span> <span class="nt">/&gt;</span>
</code></pre></div></div>

<h2 id="shaping-a-ui-for-android-tv">Shaping a UI for Android TV</h2>

<p>While the previous requirements may be enough for your app to be capable of being installed and appear on the Android TV launcher, there are more steps to follow to provide the right experience.</p>

<p>The theme of your activity has to be one with no ActionBar/Toolbar. (Even if the ActionBar can potentially work with D-pad, that’s a really bad experience to give to your users).</p>

<p>Two potential themes you can use are Theme.Leanback from the Leanback support library and android:Theme.NoTitleBar.</p>

<p>These themes don’t integrate overscan margins themselves, hence you may need to add some to your activities. Note that Leanback elements already include margins for proper overscan handling.</p>

<div class="language-xml highlighter-rouge"><div class="highlight"><pre class="highlight"><code><span class="nt">&lt;LinearLayout</span>
<span class="err">...</span>
    <span class="na">android:layout_marginTop=</span><span class="s">"27dp"</span>
    <span class="na">android:layout_marginLeft=</span><span class="s">"48dp"</span>
    <span class="na">android:layout_marginRight=</span><span class="s">"48dp"</span>
    <span class="na">android:layout_marginBottom=</span><span class="s">"27dp"</span>
<span class="err">...</span><span class="nt">&gt;</span>
</code></pre></div></div>

<h3 id="using-the-leanback-support-library">Using the Leanback support library</h3>

<p>The Leanback support library is available from API Level 17 and provides ready-to-use elements and a theme for your app.</p>

<p>If you want to continue supporting lower API levels from your application, you can keep all the references to the Leanback theme and elements inside the TV-specific part of your app and resources-v21, then use gradle’s manifest merger feature to avoid your minSdkVersion to be upgraded:</p>

<div class="language-xml highlighter-rouge"><div class="highlight"><pre class="highlight"><code><span class="nt">&lt;manifest</span> 
    <span class="na">xmlns:tools=</span><span class="s">"http://schemas.android.com/tools"</span>
    <span class="err">...</span><span class="nt">&gt;</span>

    <span class="nt">&lt;uses-sdk</span> <span class="na">tools:overrideLibrary=</span><span class="s">"android.support.v17.leanback"</span> <span class="nt">/&gt;</span>
   ...
</code></pre></div></div>

<p>You can start looking at the <a href="https://github.com/googlesamples/androidtv-Leanback/">sample</a> to see how to use the Leanback support library. I also recommend reading this good <a href="https://medium.com/building-for-android-tv/building-for-android-tv-episode-1-2d03f9ba541e">introductory article</a> from Sebastiano Gottardo (musixMatch).</p>

<h2 id="going-further-with-games">Going further with Games</h2>

<p>Android TV games can really be improved by adding a good multiplayer experience and Gamepad support.</p>

<p>From your manifest, you can specify that you support gamepads:</p>

<div class="language-xml highlighter-rouge"><div class="highlight"><pre class="highlight"><code><span class="nt">&lt;uses-feature</span> 
    <span class="na">android:name=</span><span class="s">"android.hardware.gamepad"</span>
    <span class="na">android:required=</span><span class="s">"false"</span> <span class="nt">/&gt;</span>
</code></pre></div></div>

<p>Set the feature as required only if gamepads are mandatory for your app, but remember that devices like the Nexus Player aren’t bundled with one. Additional Android devices can be used as controllers, but they only feature D-pad input as of now.</p>

<p>To support multiple user inputs, you can refer to this <a href="http://developer.android.com/training/game-controllers/index.html">training</a>.</p>

<h2 id="integrating-with-the-recommendations-system">Integrating with the Recommendations system</h2>

<p>The Recommendations system occupies half of the space of the Launcher, to appear inside it, send a notification with “recommendation” set as category, as described in the <a href="https://developer.android.com/training/tv/discovery/recommendations.html">official training</a>.</p>

<h2 id="having-a-specific-apk-for-android-tv">Having a specific APK for Android TV</h2>

<p>Through the <em>features</em> filtering functionality of the Play Store, you can restrict your APK for distribution to Android TV compatible devices, by setting the feature <em>android.software.leanback</em> as required:</p>

<div class="language-xml highlighter-rouge"><div class="highlight"><pre class="highlight"><code><span class="nt">&lt;uses-feature</span> <span class="na">android:name=</span><span class="s">"android.software.leanback"</span>
        <span class="na">android:required=</span><span class="s">"true"</span> <span class="nt">/&gt;</span>
</code></pre></div></div>

<p>When you require the leanback feature, your APK will be available only on Android-TV compatible devices.</p>

<p>You can choose to distribute this APK as a specific application on the Play Store, but you also have the choice to upload it as a TV-version of an already existing application, through the “<a href="developer.android.com/google/play/publishing/multiple-apks.html">Multiple APKs</a>” feature of the Play Store.</p>

<p>You simply have to upload this TV-specific apk that requires the leanback feature and has a different versionCode than your classic application.</p>

<h2 id="optimizing-your-application-for-the-nexus-player">Optimizing your Application for the Nexus Player</h2>

<p>While the Player is a fully 64-bit capable platform and the kernel is indeed 64-bit, all the userspace remains x86 32-bit as of now.</p>

<p>The device is able to run ARM-specific binaries perfectly fine, but providing x86 binaries is always better. You can read more about compatibility considerations for x86 devices from my previous article: <a href="//ph0b.com/improving-x86-support-of-android-apps-libs-engines/" title="How to improve x86 support of Android apps, libs, engines">How to improve x86 support of Android apps, libs, engines</a></p>

<h2 id="last-things-to-check-before-uploading-your-app">Last things to check before uploading your app</h2>

<p>A recapitulation of the guidelines for Android TV can be found on the Android developer website: <a href="https://developer.android.com/distribute/essentials/quality/tv.html">Tv App Quality</a>.</p>

<p>If you have <em>android:screenOrientation=”portrait”</em> added to any activity of your application, the <em>android.hardware.screen.portrait</em> requirement is implicitly set to true.</p>

<p>You need to explicitly set it to false inside your manifest if you want your application to be available on Android TV devices:</p>

<div class="language-xml highlighter-rouge"><div class="highlight"><pre class="highlight"><code><span class="nt">&lt;uses-feature</span>
    <span class="na">android:name=</span><span class="s">"android.hardware.screen.portrait"</span>
    <span class="na">android:required=</span><span class="s">"false"</span> <span class="nt">/&gt;</span>
</code></pre></div></div>

<p>The same is needed for:</p>

<ul>
  <li><em>android.hardware.location.android.permission.ACCESS_FINE_LOCATION</em></li>
  <li><em>android.hardware.camera.autofocus</em> and <em>android.hardware.camera</em> implied by <em>android.permission.CAMERA</em></li>
  <li><em>android.hardware.microphone</em> implied by <em>android.permission.RECORD_AUDIO</em></li>
  <li><em>android.hardware.telephony</em> implied by many telephony-specific permissions</li>
</ul>

<h2 id="submitting-your-application">Submitting your application</h2>

<p>Once your application is ready and you’ve uploaded your APK to the Play Store developer console, you still need to add a screenshot as well as your banner:</p>

<p>| <img src="/wp-content/uploads/2014/11/distribute-tv2.png" alt="distribute-tv2" /> | <img src="/wp-content/uploads/2014/11/banner.png" alt="banner" /> |
|—|—|</p>

<p>Then tick the proper checkbox to ask for distribution on Android TV:</p>

<p><a href="/wp-content/uploads/2014/11/distribute-tv.png"><img src="/wp-content/uploads/2014/11/distribute-tv.png" alt="distribute-tv" /></a>It will be manually reviewed before being available on the Play Store browsed from Android TV devices.</p>]]></content><author><name>Xavier Hallade</name></author><category term="Android" /><category term="Android" /><category term="Android TV" /><category term="Nexus Player" /><category term="porting" /><category term="x86" /><summary type="html"><![CDATA[The Nexus Player is the Android TV Nexus device from Google.]]></summary></entry><entry><title type="html">Getting an x86 version of JavaCV for Android</title><link href="https://ph0b.com/getting-an-x86-version-of-javacv-for-android/" rel="alternate" type="text/html" title="Getting an x86 version of JavaCV for Android" /><published>2014-01-15T18:54:46+00:00</published><updated>2014-01-15T18:54:46+00:00</updated><id>https://ph0b.com/getting-an-x86-version-of-javacv-for-android</id><content type="html" xml:base="https://ph0b.com/getting-an-x86-version-of-javacv-for-android/"><![CDATA[<p><a href="https://code.google.com/p/javacv/">JavaCV</a> is a wrapper of mainly OpenCV and ffmpeg libraries. While these libs are perfectly compatible with x86 flavor of Android, JavaCV doesn’t provide the build scripts nor it integrate the x86 binaries.</p>

<p>It doesn’t take much to compile the proper x86 versions of JavaCV packages, but if you’re in a hurry, here they are:</p>

<ul>
  <li><a href="/wp-content/uploads/2014/01/javacv-0.7-bin-android-x86.zip">javacv-0.7-bin-android-x86.zip</a></li>
  <li><a href="/wp-content/uploads/2014/01/javacv-0.7-cppjars-android-x86.zip">javacv-0.7-cppjars-android-x86.zip</a></li>
</ul>

<p>Now let’s look at what was needed to build these. You need the usual build tools (gcc, make…) as well as maven.</p>

<p>You first need to recompile cppjars:</p>

<h2 id="recompiling-cppjars-opencv-and-ffmpeg">Recompiling cppjars (OpenCV and ffmpeg)</h2>

<p>You can easily do so by reusing the build scripts provided in the cppjars release package:</p>

<div class="language-shell highlighter-rouge"><div class="highlight"><pre class="highlight"><code>wget https://javacv.googlecode.com/files/javacv-0.7-cppjars.zip
unzip javacv-0.7-cppjars.zip
<span class="nb">cd </span>javacv-cppjars
</code></pre></div></div>

<p>The build scripts for Android are: <strong>build_opencv-android-arm.sh</strong> and <strong>build_ffmpeg-android-arm.sh</strong>. We need to create <strong>build_opencv-android-x86.sh</strong> and <strong>build_ffmpeg-android-x86.sh</strong> equivalents of these.</p>

<p>Start by copying these scripts, then in the -x86 version, replace :</p>

<ul>
  <li><strong>arm-linux-androideabi-</strong> by <strong>i686-linux-android-</strong> (toolchain binaries prefix)</li>
  <li><strong>arm-linux-androideabi-</strong> by <strong>x86-</strong> (toolchain)</li>
  <li><strong>-march=armv7-a -mfloat-abi=softfp -mfpu=vfpv3-d16 -mfpu=neon…</strong> by <strong>-mtune=atom -mssse3 -mfpmath=sse</strong> (compiler flags)</li>
  <li><strong>arm-linux</strong> with <strong>i686-linux</strong></li>
  <li>other <strong>-arm</strong> suffixes by <strong>-x86</strong></li>
</ul>

<p>Don’t do this blindly – it will work better if you understand what you’re doing 🙂</p>

<p>In the end here is the content I have for <strong>build_ffmpeg-android-x86.sh</strong>:</p>

<div class="language-bash highlighter-rouge"><div class="highlight"><pre class="highlight"><code><span class="nv">ANDROID_BIN</span><span class="o">=</span><span class="nv">$ANDROID_NDK</span>/toolchains/x86-4.8/prebuilt/linux-x86_64/bin
<span class="nv">ANDROID_ROOT</span><span class="o">=</span><span class="nv">$ANDROID_NDK</span>/platforms/android-14/arch-x86
<span class="nb">tar</span> <span class="nt">-xjvf</span> ffmpeg-<span class="nv">$FFMPEG_VERSION</span>.tar.bz2
<span class="nb">mv </span>ffmpeg-<span class="nv">$FFMPEG_VERSION</span> ffmpeg-<span class="nv">$FFMPEG_VERSION</span><span class="nt">-android-x86</span>
<span class="nb">cd </span>ffmpeg-<span class="nv">$FFMPEG_VERSION</span><span class="nt">-android-x86</span>
<span class="nb">tar</span> <span class="nt">-xjvf</span> ../last_stable_x264.tar.bz2
<span class="nv">X264</span><span class="o">=</span><span class="sb">`</span><span class="nb">echo </span>x264-snapshot-<span class="k">*</span><span class="sb">`</span>
<span class="nb">cd</span> <span class="nv">$X264</span>
./configure <span class="nt">--enable-static</span> <span class="nt">--enable-pic</span> <span class="nt">--disable-cli</span> <span class="nt">--disable-opencl</span> <span class="nt">--cross-prefix</span><span class="o">=</span><span class="nv">$ANDROID_BIN</span>/i686-linux-android- <span class="nt">--sysroot</span><span class="o">=</span><span class="nv">$ANDROID_ROOT</span> <span class="nt">--host</span><span class="o">=</span>i686-linux <span class="nt">--extra-cflags</span><span class="o">=</span><span class="s2">"-fpic -pipe -DANDROID -DNDEBUG -mtune=atom -mssse3 -ffast-math -mfpmath=sse -fomit-frame-pointer -fstrict-aliasing -funswitch-loops -finline-limit=300"</span> <span class="nt">--extra-ldflags</span><span class="o">=</span><span class="s2">"-lm -lz -Wl,--no-undefined -Wl,-z,noexecstack"</span>
make <span class="nt">-j8</span>
<span class="nb">cd</span> ../
patch <span class="nt">-p1</span> &lt; ../ffmpeg-<span class="nv">$FFMPEG_VERSION</span><span class="nt">-android-x86</span>.patch
./configure <span class="nt">--prefix</span><span class="o">=</span><span class="nv">$ANDROID_NDK</span>/../ <span class="nt">--enable-shared</span> <span class="nt">--enable-gpl</span> <span class="nt">--enable-version3</span> <span class="nt">--enable-libx264</span> <span class="se">\</span>
 <span class="nt">--disable-static</span> <span class="nt">--disable-symver</span> <span class="nt">--disable-doc</span> <span class="nt">--disable-ffplay</span> <span class="nt">--disable-ffmpeg</span> <span class="nt">--disable-ffprobe</span> <span class="nt">--disable-ffserver</span> <span class="nt">--disable-encoders</span> <span class="nt">--disable-muxers</span> <span class="nt">--disable-devices</span> <span class="nt">--disable-demuxer</span><span class="o">=</span>sbg <span class="nt">--disable-demuxer</span><span class="o">=</span>dts <span class="nt">--disable-parser</span><span class="o">=</span>dca <span class="nt">--disable-decoder</span><span class="o">=</span>dca <span class="nt">--disable-decoder</span><span class="o">=</span>svq3 <span class="nt">--enable-network</span> <span class="nt">--enable-version3</span> <span class="nt">--disable-amd3dnow</span> <span class="nt">--disable-amd3dnowext</span> <span class="nt">--disable-outdev</span><span class="o">=</span>sdl<span class="se">\</span>
 <span class="nt">--extra-cflags</span><span class="o">=</span><span class="s2">"-I</span><span class="nv">$X264</span><span class="s2">"</span> <span class="nt">--extra-ldflags</span><span class="o">=</span><span class="s2">"-L</span><span class="nv">$X264</span><span class="s2">"</span> <span class="nt">--enable-cross-compile</span> <span class="nt">--cc</span><span class="o">=</span><span class="nv">$ANDROID_BIN</span>/i686-linux-android-gcc <span class="nt">--sysroot</span><span class="o">=</span><span class="nv">$ANDROID_ROOT</span> <span class="nt">--target-os</span><span class="o">=</span>linux <span class="nt">--arch</span><span class="o">=</span>x86 <span class="nt">--cpu</span><span class="o">=</span>i686 <span class="se">\</span>
<span class="nt">--enable-asm</span> <span class="nt">--enable-yasm</span> <span class="nt">--enable-pic</span> <span class="nt">--extra-cflags</span><span class="o">=</span><span class="s2">"-DANDROID -DNDEBUG -fPIC -pipe -mtune=atom -mssse3 -ffast-math -mfpmath=sse"</span> <span class="se">\</span>
<span class="nt">--extra-ldflags</span><span class="o">=</span><span class="s2">"-lm -lz -Wl,--no-undefined -Wl,-z,noexecstack"</span> <span class="nt">--disable-stripping</span> <span class="nt">--disable-symver</span> <span class="nt">--disable-programs</span>

make <span class="nt">-j8</span>
<span class="nv">LIBS</span><span class="o">=</span><span class="s2">"libavcodec/libavcodec.so libavdevice/libavdevice.so libavfilter/libavfilter.so libavformat/libavformat.so libavutil/libavutil.so libpostproc/libpostproc.so libswresample/libswresample.so libswscale/libswscale.so"</span>
<span class="nv">$ANDROID_NDK</span>/toolchains/x86-4.8/prebuilt/linux-x86_64/bin/i686-linux-android-strip <span class="nv">$LIBS</span>
<span class="nb">mkdir</span> <span class="nt">-p</span> com/googlecode/javacv/cpp/android-x86/
<span class="nb">cp</span> <span class="nv">$LIBS</span> com/googlecode/javacv/cpp/android-x86/
jar cvf ../ffmpeg-<span class="nv">$FFMPEG_VERSION</span><span class="nt">-android-x86</span>.jar com/
<span class="nb">rm</span> <span class="nt">-Rf</span> com/
<span class="nb">cd</span> ../
</code></pre></div></div>

<p>Here <strong>ffmpeg-$FFMPEG_VERSION-android-x86.patch</strong> is exactly the same as the arm one, you can cp it.</p>

<p>And for <strong>build_opencv-android-x86.sh</strong>:</p>

<div class="language-bash highlighter-rouge"><div class="highlight"><pre class="highlight"><code><span class="nb">tar</span> <span class="nt">-xzvf</span> opencv-<span class="nv">$OPENCV_VERSION</span>.tar.gz
<span class="nb">mkdir </span>opencv-<span class="nv">$OPENCV_VERSION</span>/build_android-x86
<span class="nb">cd </span>opencv-<span class="nv">$OPENCV_VERSION</span>
<span class="nb">cd </span>build_android-x86
<span class="nv">ANDROID_BIN</span><span class="o">=</span><span class="nv">$ANDROID_NDK</span>/toolchains/x86-4.6/prebuilt/linux-x86_64/bin/ <span class="se">\</span>
<span class="nv">ANDROID_CPP</span><span class="o">=</span><span class="nv">$ANDROID_NDK</span>/sources/cxx-stl/gnu-libstdc++/4.6/ <span class="se">\</span>
<span class="nv">ANDROID_ROOT</span><span class="o">=</span><span class="nv">$ANDROID_NDK</span>/platforms/android-9/arch-x86/ <span class="se">\</span>
cmake <span class="nt">-DCMAKE_TOOLCHAIN_FILE</span><span class="o">=</span>platforms/android/android.toolchain.cmake <span class="nt">-DANDROID_ABI</span><span class="o">=</span>x86 <span class="nt">-DOPENCV_EXTRA_C_FLAGS</span><span class="o">=</span><span class="s2">"-O3 -ffast-math -mtune=atom -mssse3 -mfpmath=sse"</span> <span class="nt">-DOPENCV_EXTRA_CXX_FLAGS</span><span class="o">=</span><span class="s2">"-O3 -ffast-math -mtune=atom -mssse3 -mfpmath=sse"</span> <span class="nt">-DCMAKE_INSTALL_PREFIX</span><span class="o">=</span><span class="nv">$ANDROID_NDK</span>/../ <span class="nt">-DBUILD_SHARED_LIBS</span><span class="o">=</span>ON <span class="nt">-DBUILD_TESTS</span><span class="o">=</span>OFF <span class="nt">-DBUILD_PERF_TESTS</span><span class="o">=</span>OFF <span class="nt">-DBUILD_ANDROID_EXAMPLES</span><span class="o">=</span>OFF <span class="nt">-DBUILD_JASPER</span><span class="o">=</span>ON <span class="nt">-DBUILD_JPEG</span><span class="o">=</span>ON <span class="nt">-DBUILD_OPENEXR</span><span class="o">=</span>ON <span class="nt">-DBUILD_PNG</span><span class="o">=</span>ON <span class="nt">-DBUILD_TBB</span><span class="o">=</span>ON <span class="nt">-DBUILD_TIFF</span><span class="o">=</span>ON <span class="nt">-DBUILD_ZLIB</span><span class="o">=</span>ON <span class="nt">-DBUILD_opencv_java</span><span class="o">=</span>OFF <span class="nt">-DBUILD_opencv_python</span><span class="o">=</span>OFF <span class="nt">-DENABLE_PRECOMPILED_HEADERS</span><span class="o">=</span>OFF <span class="nt">-DWITH_1394</span><span class="o">=</span>OFF <span class="nt">-DWITH_FFMPEG</span><span class="o">=</span>OFF <span class="nt">-DWITH_GSTREAMER</span><span class="o">=</span>OFF <span class="nt">-DWITH_TBB</span><span class="o">=</span>ON <span class="nt">-DWITH_CUDA</span><span class="o">=</span>OFF <span class="nt">-DWITH_OPENCL</span><span class="o">=</span>OFF ..
make <span class="nt">-j8</span>
<span class="nv">LIBS</span><span class="o">=</span><span class="s2">"lib/x86/libopencv*.so lib/x86/libtbb.so"</span>
<span class="nv">$ANDROID_NDK</span>/toolchains/x86-4.6/prebuilt/linux-x86_64/bin/i686-linux-android-strip <span class="nv">$LIBS</span>
<span class="nb">mkdir</span> <span class="nt">-p</span> com/googlecode/javacv/cpp/android-x86/
<span class="nb">cp</span> <span class="nv">$LIBS</span> com/googlecode/javacv/cpp/android-x86/
jar cvf ../../opencv-<span class="nv">$OPENCV_VERSION</span><span class="nt">-android-x86</span>.jar com/
<span class="nb">rm</span> <span class="nt">-Rf</span> com/
<span class="nb">cd</span> ../../
</code></pre></div></div>

<p>Here I have deleted the call to the -arm patch that was generating another android.mk file to directly rely on <strong>platforms/android/android.toolchain.cmake</strong> that is provided by <strong>OpenCV</strong> and I’ve also added specific flags to get more optimization:</p>

<div class="language-bash highlighter-rouge"><div class="highlight"><pre class="highlight"><code><span class="nt">-DANDROID_ABI</span><span class="o">=</span>x86 <span class="nt">-DOPENCV_EXTRA_C_FLAGS</span><span class="o">=</span><span class="s2">"-O3 -ffast-math -mtune=atom -mssse3 -mfpmath=sse"</span> <span class="nt">-DOPENCV_EXTRA_CXX_FLAGS</span><span class="o">=</span><span class="s2">"-O3 -ffast-math -mtune=atom -mssse3 -mfpmath=sse"</span>
</code></pre></div></div>

<p>Now if you call:</p>

<div class="language-shell highlighter-rouge"><div class="highlight"><pre class="highlight"><code>sh ./build_all.sh android-x86
<span class="nb">cd</span> ..
</code></pre></div></div>

<p>This will generate you <strong>ffmpeg-2.1.1-android-x86.jar</strong> and <strong>opencv-2.4.8-android-x86.jar</strong>.</p>

<p>Now you can finally build the JavaCV package:</p>

<h2 id="packaging-x86-version-of-javacv">Packaging x86 version of JavaCV</h2>

<p>First retrieve and install JavaCPP:</p>

<div class="language-shell highlighter-rouge"><div class="highlight"><pre class="highlight"><code>git clone https://code.google.com/p/javacpp/
<span class="nb">cd </span>javacpp/
git checkout 0.6
mvn <span class="nb">install
cd</span> ..
</code></pre></div></div>

<p>Once its done, retrieve JavaCV source code:</p>

<div class="language-shell highlighter-rouge"><div class="highlight"><pre class="highlight"><code>git clone https://code.google.com/p/javacv/
<span class="nb">cd </span>javacv
git checkout 0.7
</code></pre></div></div>

<p>You can now package the android-x86 version of <strong>JavaCV</strong> by setting the <strong>android-x86</strong> property to <strong>JavaCPP</strong> a:</p>

<div class="language-shell highlighter-rouge"><div class="highlight"><pre class="highlight"><code>mvn package <span class="nt">-Pffmpeg</span> <span class="nt">-Djavacpp</span>.options<span class="o">=</span><span class="s2">"-properties android-x86 -Dplatform.root=</span><span class="nv">$ANDROID_NDK</span><span class="s2"> -Dcompiler.path=</span><span class="nv">$ANDROID_NDK</span><span class="s2">/toolchains/x86-4.6/prebuilt/linux-x86_64/bin/i686-linux-android-g++ -Dcompiler.includepath=</span><span class="nv">$ANDROID_NDK</span><span class="s2">/sources/cxx-stl/gnu-libstdc++/4.6/include</span><span class="se">\</span><span class="s2">
:</span><span class="nv">$ANDROID_NDK</span><span class="s2">/sources/cxx-stl/gnu-libstdc++/4.6/libs/x86/include</span><span class="se">\</span><span class="s2">
:../javacv-cppjars/opencv-2.4.8/build_android-x86/</span><span class="se">\</span><span class="s2">
:../javacv-cppjars/opencv-2.4.8/modules/core/include</span><span class="se">\</span><span class="s2">
:../javacv-cppjars/opencv-2.4.8/modules/androidcamera/include</span><span class="se">\</span><span class="s2">
:../javacv-cppjars/opencv-2.4.8/modules/flann/include</span><span class="se">\</span><span class="s2">
:../javacv-cppjars/opencv-2.4.8/modules/imgproc/include</span><span class="se">\</span><span class="s2">
:../javacv-cppjars/opencv-2.4.8/modules/highgui/include</span><span class="se">\</span><span class="s2">
:../javacv-cppjars/opencv-2.4.8/modules/features2d/include</span><span class="se">\</span><span class="s2">
:../javacv-cppjars/opencv-2.4.8/modules/calib3d/include</span><span class="se">\</span><span class="s2">
:../javacv-cppjars/opencv-2.4.8/modules/ml/include</span><span class="se">\</span><span class="s2">
:../javacv-cppjars/opencv-2.4.8/modules/video/include</span><span class="se">\</span><span class="s2">
:../javacv-cppjars/opencv-2.4.8/modules/legacy/include</span><span class="se">\</span><span class="s2">
:../javacv-cppjars/opencv-2.4.8/modules/objdetect/include</span><span class="se">\</span><span class="s2">
:../javacv-cppjars/opencv-2.4.8/modules/photo/include</span><span class="se">\</span><span class="s2">
:../javacv-cppjars/opencv-2.4.8/modules/gpu/include</span><span class="se">\</span><span class="s2">
:../javacv-cppjars/opencv-2.4.8/modules/nonfree/include</span><span class="se">\</span><span class="s2">
:../javacv-cppjars/opencv-2.4.8/modules/contrib/include</span><span class="se">\</span><span class="s2">
:../javacv-cppjars/opencv-2.4.8/modules/stitching/include</span><span class="se">\</span><span class="s2">
:../javacv-cppjars/opencv-2.4.8/modules/ts/include</span><span class="se">\</span><span class="s2">
:../javacv-cppjars/opencv-2.4.8/modules/videostab/include</span><span class="se">\</span><span class="s2">
:../javacv-cppjars/ffmpeg-2.1.1-android-x86 </span><span class="se">\</span><span class="s2">
-Dcompiler.linkpath=</span><span class="nv">$ANDROID_NDK</span><span class="s2">/sources/cxx-stl/gnu-libstdc++/4.6/libs/x86</span><span class="se">\</span><span class="s2">
:../javacv-cppjars/opencv-2.4.8/build_android-x86/lib/x86</span><span class="se">\</span><span class="s2">
:../javacv-cppjars/ffmpeg-2.1.1-android-x86/libswscale</span><span class="se">\</span><span class="s2">
:../javacv-cppjars/ffmpeg-2.1.1-android-x86/libavcodec</span><span class="se">\</span><span class="s2">
:../javacv-cppjars/ffmpeg-2.1.1-android-x86/libswresample</span><span class="se">\</span><span class="s2">
:../javacv-cppjars/ffmpeg-2.1.1-android-x86/libpostproc</span><span class="se">\</span><span class="s2">
:../javacv-cppjars/ffmpeg-2.1.1-android-x86/libavfilter</span><span class="se">\</span><span class="s2">
:../javacv-cppjars/ffmpeg-2.1.1-android-x86/libavformat</span><span class="se">\</span><span class="s2">
:../javacv-cppjars/ffmpeg-2.1.1-android-x86/libavutil</span><span class="se">\</span><span class="s2">
:../javacv-cppjars/ffmpeg-2.1.1-android-x86/libavdevice"</span>
</code></pre></div></div>

<p>You’ll get your packages in <strong>target/</strong>:</p>

<div class="language-text highlighter-rouge"><div class="highlight"><pre class="highlight"><code>2.7M Jan 15 19:09 javacv-android-x86.jar
3.6M Jan 15 19:09 javacv-bin.zip
747K Jan 15 19:09 javacv-src.zip
734K Jan 15 19:09 javacv.jar
</code></pre></div></div>

<h2 id="adding-this-x86-version-to-your-app">Adding this x86 version to your app</h2>

<p>From the packages I gave at the beginning of this article or from what you’ve just built, you can now copy the <a href="/wp-content/uploads/2014/01/javacv-0.7-cppjars-android-x86.zip">generated .so files</a> that are inside <strong>javacv-android-x86.jar</strong>, <strong>ffmpeg-2.1.1-android-x86.jar</strong> and <strong>opencv-2.4.8-android-x86.jar</strong> into the <strong>/lib/x86/</strong> folder of your Android package, the same way as the arm versions inside <strong>/lib/armeabi-v7a/</strong>.</p>

<p>To get more information on how to deal with .so files and APKs, please refer to these two previous articles:</p>

<ul>
  <li><a href="http://ph0b.com/improving-x86-support-of-android-apps-libs-engines/">http://ph0b.com/improving-x86-support-of-android-apps-libs-engines/</a></li>
  <li><a href="http://ph0b.com/android-studio-gradle-and-ndk-integration/">http://ph0b.com/android-studio-gradle-and-ndk-integration/</a></li>
</ul>]]></content><author><name>Xavier Hallade</name></author><category term="Android" /><category term="Android" /><category term="JavaCV" /><category term="library" /><category term="OpenCV" /><category term="porting" /><category term="x86" /><summary type="html"><![CDATA[JavaCV is a wrapper of mainly OpenCV and ffmpeg libraries. While these libs are perfectly compatible with x86 flavor of Android, JavaCV doesn’t provide the build scripts nor it integrate the x86 binaries.]]></summary></entry><entry><title type="html">Adding dev tools (gcc, make…) to Galileo SD image and using nodejs with native extensions</title><link href="https://ph0b.com/adding-dev-tools-gcc-make-to-galileo-sd-image/" rel="alternate" type="text/html" title="Adding dev tools (gcc, make…) to Galileo SD image and using nodejs with native extensions" /><published>2014-01-15T18:01:10+00:00</published><updated>2014-01-15T18:01:10+00:00</updated><id>https://ph0b.com/adding-dev-tools-gcc-make-to-galileo-sd-image</id><content type="html" xml:base="https://ph0b.com/adding-dev-tools-gcc-make-to-galileo-sd-image/"><![CDATA[<p><a href="http://arduino.cc/en/ArduinoCertified/IntelGalileo">Galileo</a> is an <strong>Arduino</strong> that runs on a (x86) Intel® Quark X1000 SOC.</p>

<p><img src="/wp-content/uploads/2014/01/IntelGalileo_fabD_Front_450px-150x150.jpg" alt="IntelGalileo_fabD_Front_450px" /></p>

<p>While it’s fully compatible with <strong>Arduino</strong> Software Development Environment, it’s also capable of running a <strong>full Linux distribution</strong>.</p>

<p><strong>Sept. 2014 update</strong>: GCC and other dev tools are now part of the official linux image you can download from <a href="https://software.intel.com/en-us/iot/downloads">Intel Developer Zone</a>.</p>

<p>You can get such distribution from the <a href="https://communities.intel.com/docs/DOC-22226">official website</a>. The “LINUX IMAGE FOR SD for Intel Galileo” is a <a href="https://www.yoctoproject.org/tools-resources/projects/poky">poky</a> distribution built using <a href="https://www.yoctoproject.org">Yocto</a>. It’s using <strong>uClibc</strong> and contains useful binaries like <strong>SSHd</strong>, <strong>bluez</strong>, <strong>nodejs</strong> and <strong>OpenCV</strong> while it can still run <strong>Arduino sketches</strong> !</p>

<p>It’s really simple to install it: you only need to unzip the .7z package at the root of a FAT32 formatted microSD.</p>

<p>I’ve came across some interesting nodejs modules, and some of them are relying on native extensions. Cross-compiling these seemed complicated so I’ve chosen another way to get these working on my Galileo: rebuilding the poky distribution to add dev tools.</p>

<p>And while it may sound complicated… it’s in fact dead simple thanks to the way <strong>Yocto</strong> is working.</p>

<p>First set up your build environment the same way you would build the same image than the one distributed on the official website, by downloading Galileo BSP and setting up Yocto:</p>

<div class="language-shell highlighter-rouge"><div class="highlight"><pre class="highlight"><code>wget http://downloadmirror.intel.com/23171/eng/Board_Support_Package_Sources_for_Intel_Quark_v0.7.5.7z
7z x Board_Support_Package_Sources_for_Intel_Quark_v0.7.5.7z
<span class="nb">tar </span>xzvf Board_Support_Package_Sources_for_Intel_Quark_v0.7.5/meta-clanton_v0.7.5.tar.gz
<span class="nb">cd </span>meta-clanton_v0.7.5
./setup.sh
<span class="nb">source </span>poky/oe-init-build-env yocto_build
</code></pre></div></div>

<p>Stop here to create your custom configuration:</p>

<div class="language-shell highlighter-rouge"><div class="highlight"><pre class="highlight"><code><span class="nb">cp</span> ../meta-clanton-distro/recipes-core/images/image-full.bb ../meta-clanton-distro/recipes-core/images/image-custom.bb
</code></pre></div></div>

<p>Here I’ve chosen to triple the filesystem size to make it around 900mo:</p>

<div class="language-shell highlighter-rouge"><div class="highlight"><pre class="highlight"><code>IMAGE_ROOTFS_SIZE <span class="o">=</span> <span class="s2">"921600"</span>
</code></pre></div></div>

<p>added -dev packages to the image by adding <strong>dev-pkgs</strong> feature:</p>

<div class="language-shell highlighter-rouge"><div class="highlight"><pre class="highlight"><code>IMAGE_FEATURES +<span class="o">=</span> <span class="s2">"package-management dev-pkgs"</span>
</code></pre></div></div>

<p>added the tools I wanted by adding this line:</p>

<div class="language-shell highlighter-rouge"><div class="highlight"><pre class="highlight"><code>IMAGE_INSTALL +<span class="o">=</span> <span class="s2">"autoconf automake binutils binutils-symlinks cpp cpp-symlinks gcc gcc-symlinks g++ g++-symlinks gettext make libstdc++ libstdc++-dev file coreutils"</span>
</code></pre></div></div>

<p>and also integrated the right firmware for my Wi-Fi/BT4.0 chipset (<a href="http://www.amazon.com/Intel-Centrino®-Advanced-N-6235-6235ANHMW/dp/B009SJTSWU">Centrino 6235</a>) by adding this line:</p>

<div class="language-shell highlighter-rouge"><div class="highlight"><pre class="highlight"><code>IMAGE_INSTALL +<span class="o">=</span> <span class="s2">"linux-firmware-iwlwifi-6000g2b-6"</span>
</code></pre></div></div>

<p>Finally you can build your custom distribution:</p>

<div class="language-shell highlighter-rouge"><div class="highlight"><pre class="highlight"><code>bitbake image-custom
</code></pre></div></div>

<p>For me this process took around 20GB space and around an hour of automated download/build. Once its done you’ll find your generated files inside <em>yocto_build/tmp/deploy/images</em>. You can copy these to your microSD like so:</p>

<ul>
  <li>latest bzImage-* as <em>bzImage</em></li>
  <li>latest core-image-minimal-initramfs-* as <em>core-image-minimal-initramfs-clanton.cpio.gz</em></li>
  <li>latest image-* as <em>image-full-clanton.ext3</em></li>
  <li>boot folder as <em>boot</em></li>
</ul>

<p>Now you can easily get useful <strong>nodejs</strong> <strong>modules</strong> with native extensions – they will be compiled on the Galileo itself :</p>

<p><em>npm install socket.io</em>
<a href="/wp-content/uploads/2014/01/socketio-build.png"><img src="/wp-content/uploads/2014/01/socketio-build.png" alt="socketio-build" /></a></p>

<p>And if you don’t have the time and bandwidth to spare, you can directly download the <a href="/wp-content/uploads/2014/01/linux_image_for_sd_with_dev_tools.zip">custom image</a> I’ve generated 🙂</p>

<p>update: There is now an official SD image with gcc support: <a href="https://software.intel.com/en-us/iotdevkit">https://software.intel.com/en-us/iotdevkit</a></p>

<p>If you want to get more information on how to build your own image or learn how to use another libc than uClibc, you should read this article: <a href="http://www.malinov.com/Home/sergey-s-blog/intelgalileo-buildinglinuximage">Intel Galileo – Building Linux Image</a></p>

<p>PS: I’ve encountered one small bug with the image I’ve generated, stdbuf couldn’t find ‘libstdbuf.so’. You can easily fix this by running <code class="language-plaintext highlighter-rouge">ln -s /usr/lib/coreutils/libstdbuf.so /usr/lib/coreutils/coreutils/</code></p>]]></content><author><name>Xavier Hallade</name></author><category term="Arduino" /><category term="arduino" /><category term="galileo" /><category term="Intel" /><category term="nodejs" /><category term="x86" /><category term="yocto" /><summary type="html"><![CDATA[Galileo is an Arduino that runs on a (x86) Intel® Quark X1000 SOC.]]></summary></entry><entry><title type="html">Android Studio, gradle and NDK integration</title><link href="https://ph0b.com/android-studio-gradle-and-ndk-integration/" rel="alternate" type="text/html" title="Android Studio, gradle and NDK integration" /><published>2014-01-07T18:15:08+00:00</published><updated>2014-01-07T18:15:08+00:00</updated><id>https://ph0b.com/android-studio-gradle-and-ndk-integration</id><content type="html" xml:base="https://ph0b.com/android-studio-gradle-and-ndk-integration/"><![CDATA[<p>With the recent changes (release 0.7.3 around Dec 27), the new Android Build System starts to be really interesting also if you are using the NDK!</p>

<p>Now this is really easy to integrate native libraries in your package and generate APKs for different architectures while correctly handling version codes (for more information on why this may be important, please refer to my <a href="http://ph0b.com/alljoyn-for-x86-android-platforms/" title="x86 version of AllJoyn for Android platforms">first article</a>).</p>

<p>update 2015/08/10: this article remains fully up-to-date if you’re using the recent Android Studio and the stable Android gradle plugin (set <em>android.useDeprecatedNdk=true</em> inside <em>gradle.properties</em>). Another article on gradle-experimental is in the work!</p>

<p>update 2014/11/1: changed output.abiFilter to output.getFilter(com.android.build.OutputFile.ABI) in order to work with gradle 0.14</p>

<p>update 2014/09/19: I’ve added information and modified my sample <a href="#mygradlefile">build.gradle</a> to demonstrate the brand new <strong>APK Splits</strong> feature introduced by the latest android gradle plugin (<strong>0.13</strong>)</p>

<p>update 2: I’ve modified the sample <a href="#mygradlefile">build.gradle</a> file to make it call <strong>ndk-build</strong> scripts by itself.</p>

<p>update 1: Here is a screencast on how to set up a project with <strong>NDK sources</strong> from Android Studio:</p>

<iframe allowfullscreen="allowfullscreen" frameborder="0" height="390" loading="lazy" src="//www.youtube.com/embed/okLKfxfbz40/?vq=hd720" width="640"></iframe>

<h2 id="integrating-so-files-into-your-apk">Integrating .so files into your APK</h2>

<p>If you are using Android Studio and need to integrate native libraries in your app, you may have had to use some complex methods before, involving maven and .aar/.jar packages… the good news is you don’t need these anymore 🙂</p>

<p><a href="/wp-content/uploads/2014/01/jniLibs.png"><img src="/wp-content/uploads/2014/01/jniLibs.png" alt="jniLibs" /></a></p>

<p>You only need to put your .so libraries inside the <strong>jniLibs</strong> folder under sub-directories named against each supported ABI (x86, mips, armeabi-v7a, armeabi), and that’s it !</p>

<p>Once it’s done, all the .so files will be integrated into your apk when you build it:</p>

<p><a href="/wp-content/uploads/2014/01/fatbinary.png"><img src="/wp-content/uploads/2014/01/fatbinary.png" alt="fatbinary" /></a></p>

<p>If the <strong>jniLibs</strong> folder name doesn’t suit you (you may generate your .so files somewhere else), you can set a specific location in <strong>build.gradle</strong>:</p>

<div class="language-plaintext highlighter-rouge"><div class="highlight"><pre class="highlight"><code>android {
    ...
    sourceSets.main {
        jniLibs.srcDir 'src/main/libs'
    }
}
</code></pre></div></div>

<h2 id="building-one-apk-per-architecture-and-doing-it-well">Building one APK per architecture, and doing it well!</h2>

<p>You can use flavors to build one APK per architecture really easily, by using <strong>abiFilter</strong> property.</p>

<p><strong>ndk.abiFilter(s)</strong> is by default set to <strong>all</strong>. This property has an impact on the integration of .so files as well as the calls to ndk-build (I’ll talk about it at the end of this article).</p>

<p>Let’s add some architecture flavors in <strong>build.gradle</strong>:</p>

<div class="language-plaintext highlighter-rouge"><div class="highlight"><pre class="highlight"><code>android{
  ...
  productFlavors {
        x86 {
            ndk {
                abiFilter "x86"
            }
        }
        mips {
            ndk {
                abiFilter "mips"
            }
        }
        armv7 {
            ndk {
                abiFilter "armeabi-v7a"
            }
        }
        arm {
            ndk {
                abiFilter "armeabi"
            }
        }
        fat
    }
}
</code></pre></div></div>

<p>And then, sync your project with gradle files:</p>

<p><a href="/wp-content/uploads/2014/01/sync.png"><img src="/wp-content/uploads/2014/01/sync.png" alt="sync" /></a></p>

<p>You should now be able to enjoy these new flavors by selecting the build variants you want:</p>

<p><a href="/wp-content/uploads/2014/01/buildVariants.png"><img src="/wp-content/uploads/2014/01/buildVariants.png" alt="buildVariants" /></a></p>

<p>Each of these variants will give you an APK for the designated architecture:</p>

<p><em>app-x86-release-unsigned.apk</em>:</p>

<p><a href="/wp-content/uploads/2014/01/thinbinary.png"><img src="/wp-content/uploads/2014/01/thinbinary.png" alt="thinbinary" title="app-x86-release-unsigned.apk" /></a></p>

<table>
  <tbody>
    <tr>
      <td>The fat(Release</td>
      <td>Debug) one will still contain all the libs, like the standard package from the beginning of this blog post.</td>
    </tr>
  </tbody>
</table>

<p><em>But don’t stop reading here!</em> These arch-dependent APKs are useful when developing, but if you want to upload several of these to the Google Play Store, you have to set a different <strong>versionCode</strong> for each. And thanks to the latest android build system, this is really easy:</p>

<h2 id="automatically-setting-different-version-codes-for-abi-dependent-apks">Automatically setting different version codes for ABI dependent APKs</h2>

<p>The property <strong>android.defaultConfig.versionCode</strong> holds the <strong>versionCode</strong> for your app. By default it’s set to <strong>-1</strong> and if you don’t change it, the <strong>versionCode</strong> set in your <strong>AndroidManifest.xml</strong> file will be used instead.</p>

<p>Hence if you want to be able to dynamically modify your <strong>versionCode</strong>, you need to first specify it inside your <strong>build.gradle</strong>:</p>

<div class="language-gradle highlighter-rouge"><div class="highlight"><pre class="highlight"><code><span class="n">android</span> <span class="o">{</span>
    <span class="o">...</span>
    <span class="n">defaultConfig</span><span class="o">{</span>
        <span class="n">versionName</span> <span class="s2">"1.1.0"</span>
        <span class="n">versionCode</span> <span class="mi">110</span>
    <span class="o">}</span>
<span class="o">}</span>
</code></pre></div></div>

<p>But this is still possible to keep setting this variable only inside your <strong>AndroidManifest.xml</strong> if you retrieve it “manually” before modifying it:</p>

<div class="language-gradle highlighter-rouge"><div class="highlight"><pre class="highlight"><code><span class="kn">import</span> <span class="nn">java.util.regex.Pattern</span>

<span class="n">android</span> <span class="o">{</span>
    <span class="o">...</span>
    <span class="n">defaultConfig</span><span class="o">{</span>
        <span class="n">versionCode</span> <span class="nf">getVersionCodeFromManifest</span><span class="o">()</span>
    <span class="o">}</span>
    <span class="o">...</span>
<span class="o">}</span>

<span class="kt">def</span> <span class="nf">getVersionCodeFromManifest</span><span class="o">()</span> <span class="o">{</span>
    <span class="kt">def</span> <span class="n">manifestFile</span> <span class="o">=</span> <span class="n">file</span><span class="o">(</span><span class="n">android</span><span class="o">.</span><span class="na">sourceSets</span><span class="o">.</span><span class="na">main</span><span class="o">.</span><span class="na">manifest</span><span class="o">.</span><span class="na">srcFile</span><span class="o">)</span>
    <span class="kt">def</span> <span class="n">pattern</span> <span class="o">=</span> <span class="n">Pattern</span><span class="o">.</span><span class="na">compile</span><span class="o">(</span><span class="s2">"versionCode=\"(\\d+)\""</span><span class="o">)</span>
    <span class="kt">def</span> <span class="n">matcher</span> <span class="o">=</span> <span class="n">pattern</span><span class="o">.</span><span class="na">matcher</span><span class="o">(</span><span class="n">manifestFile</span><span class="o">.</span><span class="na">getText</span><span class="o">())</span>
    <span class="n">matcher</span><span class="o">.</span><span class="na">find</span><span class="o">()</span>
    <span class="k">return</span> <span class="n">Integer</span><span class="o">.</span><span class="na">parseInt</span><span class="o">(</span><span class="n">matcher</span><span class="o">.</span><span class="na">group</span><span class="o">(</span><span class="mi">1</span><span class="o">))</span>
<span class="o">}</span>
</code></pre></div></div>

<p>Once it’s done, you can prefix the <strong>versionCode</strong> inside your different flavors:</p>

<div class="language-gradle highlighter-rouge"><div class="highlight"><pre class="highlight"><code><span class="n">android</span> <span class="o">{</span>
    <span class="o">...</span>
    <span class="n">productFlavors</span> <span class="o">{</span>
        <span class="n">x86</span> <span class="o">{</span>
            <span class="n">versionCode</span> <span class="n">Integer</span><span class="o">.</span><span class="na">parseInt</span><span class="o">(</span><span class="s2">"6"</span> <span class="o">+</span> <span class="n">defaultConfig</span><span class="o">.</span><span class="na">versionCode</span><span class="o">)</span>
            <span class="n">ndk</span> <span class="o">{</span>
                <span class="n">abiFilter</span> <span class="s2">"x86"</span>
            <span class="o">}</span>
        <span class="o">}</span>
        <span class="n">mips</span> <span class="o">{</span>
            <span class="n">versionCode</span> <span class="n">Integer</span><span class="o">.</span><span class="na">parseInt</span><span class="o">(</span><span class="s2">"4"</span> <span class="o">+</span> <span class="n">defaultConfig</span><span class="o">.</span><span class="na">versionCode</span><span class="o">)</span>
            <span class="n">ndk</span> <span class="o">{</span>
                <span class="n">abiFilter</span> <span class="s2">"mips"</span>
            <span class="o">}</span>
        <span class="o">}</span>
        <span class="n">armv7</span> <span class="o">{</span>
            <span class="n">versionCode</span> <span class="n">Integer</span><span class="o">.</span><span class="na">parseInt</span><span class="o">(</span><span class="s2">"2"</span> <span class="o">+</span> <span class="n">defaultConfig</span><span class="o">.</span><span class="na">versionCode</span><span class="o">)</span>
            <span class="n">ndk</span> <span class="o">{</span>
                <span class="n">abiFilter</span> <span class="s2">"armeabi-v7a"</span>
            <span class="o">}</span>
        <span class="o">}</span>
        <span class="n">arm</span> <span class="o">{</span>
            <span class="n">versionCode</span> <span class="n">Integer</span><span class="o">.</span><span class="na">parseInt</span><span class="o">(</span><span class="s2">"1"</span> <span class="o">+</span> <span class="n">defaultConfig</span><span class="o">.</span><span class="na">versionCode</span><span class="o">)</span>
            <span class="n">ndk</span> <span class="o">{</span>
                <span class="n">abiFilter</span> <span class="s2">"armeabi"</span>
            <span class="o">}</span>
        <span class="o">}</span>
        <span class="n">fat</span>
    <span class="o">}</span>
<span class="o">}</span>
</code></pre></div></div>

<p>Here I’ve prefixed it with 6 for x86, 4 for mips, 2 for ARMv7 and 1 for ARMv5. If you’re asking yourself <strong><em>why!?</em></strong> please refer to this paragraph I wrote before on <a href="http://ph0b.com/improving-x86-support-of-android-apps-libs-engines/#ArchDependentAPKs">architecture dependent APKs on the Play Store</a>.</p>

<h2 id="improving-multiple-apks-creation-and-versioncode-handling-with-apk-splits">Improving multiple APKs creation and versionCode handling with <em>APK Splits</em></h2>

<p>Since version 0.13 of the android plugin, instead of having a product flavors to get multiple APKs, you can use splits to have a single build (and variant) that will produce multiple APKs (and it’s much cleaner and faster).</p>

<div class="language-gradle highlighter-rouge"><div class="highlight"><pre class="highlight"><code>    <span class="n">splits</span> <span class="o">{</span>
        <span class="n">abi</span> <span class="o">{</span>
            <span class="n">enable</span> <span class="kc">true</span> <span class="c1">// enable ABI split feature to create one APK per ABI</span>
            <span class="n">universalApk</span> <span class="kc">true</span> <span class="c1">//generate an additional APK that targets all the ABIs</span>
        <span class="o">}</span>
    <span class="o">}</span>
    <span class="c1">// map for the version code</span>
    <span class="n">project</span><span class="o">.</span><span class="na">ext</span><span class="o">.</span><span class="na">versionCodes</span> <span class="o">=</span> <span class="o">[</span><span class="s1">'armeabi'</span><span class="o">:</span><span class="mi">1</span><span class="o">,</span> <span class="s1">'armeabi-v7a'</span><span class="o">:</span><span class="mi">2</span><span class="o">,</span> <span class="s1">'arm64-v8a'</span><span class="o">:</span><span class="mi">3</span><span class="o">,</span> <span class="s1">'mips'</span><span class="o">:</span><span class="mi">5</span><span class="o">,</span> <span class="s1">'mips64'</span><span class="o">:</span><span class="mi">6</span><span class="o">,</span> <span class="s1">'x86'</span><span class="o">:</span><span class="mi">8</span><span class="o">,</span> <span class="s1">'x86_64'</span><span class="o">:</span><span class="mi">9</span><span class="o">]</span>

    <span class="n">android</span><span class="o">.</span><span class="na">applicationVariants</span><span class="o">.</span><span class="na">all</span> <span class="o">{</span> <span class="n">variant</span> <span class="o">-&gt;</span>
        <span class="c1">// assign different version code for each output</span>
        <span class="n">variant</span><span class="o">.</span><span class="na">outputs</span><span class="o">.</span><span class="na">each</span> <span class="o">{</span> <span class="n">output</span> <span class="o">-&gt;</span>
            <span class="n">output</span><span class="o">.</span><span class="na">versionCodeOverride</span> <span class="o">=</span>
                    <span class="n">project</span><span class="o">.</span><span class="na">ext</span><span class="o">.</span><span class="na">versionCodes</span><span class="o">.</span><span class="na">get</span><span class="o">(</span><span class="n">output</span><span class="o">.</span><span class="na">getFilter</span><span class="o">(</span><span class="n">com</span><span class="o">.</span><span class="na">android</span><span class="o">.</span><span class="na">build</span><span class="o">.</span><span class="na">OutputFile</span><span class="o">.</span><span class="na">ABI</span><span class="o">),</span> <span class="mi">0</span><span class="o">)</span> <span class="o">*</span> <span class="mi">1000000</span> <span class="o">+</span> <span class="n">android</span><span class="o">.</span><span class="na">defaultConfig</span><span class="o">.</span><span class="na">versionCode</span>
        <span class="o">}</span>
    <span class="o">}</span>
</code></pre></div></div>

<h2 id="compiling-your-cc-source-code-from-android-studio">Compiling your C/C++ source code from Android Studio</h2>

<p>If you have a <strong>jni/</strong> folder in your project sources, the build system will try to call <strong>ndk-build</strong> automatically.</p>

<p><del>As of 0.7.3, this integration is only working on Unix-compatible systems, cf <a href="https://code.google.com/p/android/issues/detail?id=63896">bug 63896</a>. On Windows you’ll want to disable it so you can call <strong>ndk-build.cmd</strong> yourself. You can do so by setting this in <strong>build.gradle</strong>:</del> this has been fixed 🙂</p>

<p>The current implementation is ignoring your Android.mk makefiles and create a new one on the fly. While it’s really convenient for simple projects (you don’t need <strong>*.mk</strong> files anymore !), it may be more annoying for projects where you need all the features offered by Makefiles. You can then disable this properly in build.gradle:</p>

<div class="language-gradle highlighter-rouge"><div class="highlight"><pre class="highlight"><code><span class="n">android</span><span class="o">{</span>
    <span class="o">...</span>
    <span class="k">sourceSets</span><span class="o">.</span><span class="na">main</span><span class="o">.</span><span class="na">jni</span><span class="o">.</span><span class="na">srcDirs</span> <span class="o">=</span> <span class="o">[]</span> <span class="c1">//disable automatic ndk-build call</span>
<span class="o">}</span>
</code></pre></div></div>

<p>If you want to use the on-the-fly generated Makefile, you can configure it first by setting the <strong>ndk</strong>.<strong>moduleName</strong> property, like so:</p>

<div class="language-gradle highlighter-rouge"><div class="highlight"><pre class="highlight"><code><span class="n">android</span> <span class="o">{</span>
 <span class="o">...</span>
 <span class="n">defaultConfig</span> <span class="o">{</span>
        <span class="n">ndk</span> <span class="o">{</span>
            <span class="n">moduleName</span> <span class="s2">"hello-jni"</span>
        <span class="o">}</span>
    <span class="o">}</span>
<span class="o">}</span>
</code></pre></div></div>

<p>And you’re still able to set these other ndk properties:</p>

<ul>
  <li><strong>**cFlags</strong>**</li>
  <li><strong>ldLibs</strong></li>
  <li><strong>stl</strong> (ie: <strong>gnustl_shared</strong>, <strong>stlport_static</strong>…)</li>
  <li><strong>abiFilters</strong> (ie: <strong>“x86”, “armeabi-v7a”</strong>)</li>
</ul>

<p>You can also set <strong>android.buildTypes.debug.jniDebuggable</strong> to true so it will pass <strong>NDK_DEBUG=1</strong> to <strong>ndk-build</strong> when generating a debug APK.</p>

<p>If you are using RenderScript from the NDK, you’ll need also to set the specific property <strong>defaultConfig.renderscriptNdkMode</strong> to <em>true</em>.</p>

<p>If you rely on auto-generate Makefiles, you can’t easily set different <strong>cFlags</strong> depending on the target architecture when you’re building multi-arch APKs. So if you want to entirely rely on gradle I recommend you to generate different libs per architecture by using flavors like I’ve described earlier in this post:</p>

<div class="language-gradle highlighter-rouge"><div class="highlight"><pre class="highlight"><code>  <span class="o">...</span>
  <span class="n">productFlavors</span> <span class="o">{</span>
    <span class="n">x86</span> <span class="o">{</span>
        <span class="n">versionCode</span> <span class="n">Integer</span><span class="o">.</span><span class="na">parseInt</span><span class="o">(</span><span class="s2">"6"</span> <span class="o">+</span> <span class="n">defaultConfig</span><span class="o">.</span><span class="na">versionCode</span><span class="o">)</span>
        <span class="n">ndk</span> <span class="o">{</span>
            <span class="n">cFlags</span> <span class="n">cFlags</span> <span class="o">+</span> <span class="s2">" -mtune=atom -mssse3 -mfpmath=sse"</span>
            <span class="n">abiFilter</span> <span class="s2">"x86"</span>
        <span class="o">}</span>
    <span class="o">}</span>
    <span class="o">...</span>
</code></pre></div></div>

<p><a name="mygradlefile"></a></p>

<h2 id="my-sample-gradle-file">My sample .gradle file</h2>

<p>Putting this altogether, Here is one <strong>build.gradle</strong> file I’m curently using. It’s using APK Splits to generate multiple APKs, it doesn’t use ndk-build integration to still rely on Android.mk and Application.mk files, and doesn’t require changing the usual location of sources and libs (sources in <strong>jni/</strong>, libs in <strong>libs/</strong>). It’s also automatically calling ndk-build script from the right directory:</p>

<div class="language-gradle highlighter-rouge"><div class="highlight"><pre class="highlight"><code><span class="kn">import</span> <span class="nn">org.apache.tools.ant.taskdefs.condition.Os</span>

<span class="n">apply</span> <span class="nl">plugin:</span> <span class="s1">'com.android.application'</span>

<span class="n">android</span> <span class="o">{</span>
    <span class="n">compileSdkVersion</span> <span class="mi">21</span>
    <span class="n">buildToolsVersion</span> <span class="s2">"21.1"</span>

    <span class="n">defaultConfig</span><span class="o">{</span>
        <span class="n">minSdkVersion</span> <span class="mi">16</span>
        <span class="n">targetSdkVersion</span> <span class="mi">21</span>
        <span class="n">versionCode</span> <span class="mi">101</span>
        <span class="n">versionName</span> <span class="s2">"1.0.1"</span>
    <span class="o">}</span>

    <span class="k">sourceSets</span><span class="o">.</span><span class="na">main</span> <span class="o">{</span>
        <span class="n">jniLibs</span><span class="o">.</span><span class="na">srcDir</span> <span class="s1">'src/main/libs'</span>
        <span class="n">jni</span><span class="o">.</span><span class="na">srcDirs</span> <span class="o">=</span> <span class="o">[]</span> <span class="c1">//disable automatic ndk-build call</span>
    <span class="o">}</span>

   <span class="n">project</span><span class="o">.</span><span class="na">ext</span><span class="o">.</span><span class="na">versionCodes</span> <span class="o">=</span> <span class="o">[</span><span class="s1">'armeabi'</span><span class="o">:</span><span class="mi">1</span><span class="o">,</span> <span class="s1">'armeabi-v7a'</span><span class="o">:</span><span class="mi">2</span><span class="o">,</span> <span class="s1">'arm64-v8a'</span><span class="o">:</span><span class="mi">3</span><span class="o">,</span> <span class="s1">'mips'</span><span class="o">:</span><span class="mi">5</span><span class="o">,</span> <span class="s1">'mips64'</span><span class="o">:</span><span class="mi">6</span><span class="o">,</span> <span class="s1">'x86'</span><span class="o">:</span><span class="mi">8</span><span class="o">,</span> <span class="s1">'x86_64'</span><span class="o">:</span><span class="mi">9</span><span class="o">]</span> <span class="c1">//versionCode digit for each supported ABI, with 64bit&gt;32bit and x86&gt;armeabi-*</span>

    <span class="n">android</span><span class="o">.</span><span class="na">applicationVariants</span><span class="o">.</span><span class="na">all</span> <span class="o">{</span> <span class="n">variant</span> <span class="o">-&gt;</span>
        <span class="c1">// assign different version code for each output</span>
        <span class="n">variant</span><span class="o">.</span><span class="na">outputs</span><span class="o">.</span><span class="na">each</span> <span class="o">{</span> <span class="n">output</span> <span class="o">-&gt;</span>
            <span class="n">output</span><span class="o">.</span><span class="na">versionCodeOverride</span> <span class="o">=</span>
 <span class="n">project</span><span class="o">.</span><span class="na">ext</span><span class="o">.</span><span class="na">versionCodes</span><span class="o">.</span><span class="na">get</span><span class="o">(</span><span class="n">output</span><span class="o">.</span><span class="na">getFilter</span><span class="o">(</span><span class="n">com</span><span class="o">.</span><span class="na">android</span><span class="o">.</span><span class="na">build</span><span class="o">.</span><span class="na">OutputFile</span><span class="o">.</span><span class="na">ABI</span><span class="o">),</span> <span class="mi">0</span><span class="o">)</span> <span class="o">*</span> <span class="mi">1000000</span> <span class="o">+</span> <span class="n">defaultConfig</span><span class="o">.</span><span class="na">versionCode</span>
        <span class="o">}</span>
    <span class="o">}</span>

    <span class="c1">// call regular ndk-build(.cmd) script from app directory</span>
    <span class="n">task</span> <span class="nf">ndkBuild</span><span class="o">(</span><span class="nl">type:</span> <span class="n">Exec</span><span class="o">)</span> <span class="o">{</span>
        <span class="k">if</span> <span class="o">(</span><span class="n">Os</span><span class="o">.</span><span class="na">isFamily</span><span class="o">(</span><span class="n">Os</span><span class="o">.</span><span class="na">FAMILY_WINDOWS</span><span class="o">))</span> <span class="o">{</span>
            <span class="n">commandLine</span> <span class="s1">'ndk-build.cmd'</span><span class="o">,</span> <span class="s1">'-C'</span><span class="o">,</span> <span class="n">file</span><span class="o">(</span><span class="s1">'src/main'</span><span class="o">).</span><span class="na">absolutePath</span>
        <span class="o">}</span> <span class="k">else</span> <span class="o">{</span>
            <span class="n">commandLine</span> <span class="s1">'ndk-build'</span><span class="o">,</span> <span class="s1">'-C'</span><span class="o">,</span> <span class="n">file</span><span class="o">(</span><span class="s1">'src/main'</span><span class="o">).</span><span class="na">absolutePath</span>
        <span class="o">}</span>
    <span class="o">}</span>

    <span class="n">tasks</span><span class="o">.</span><span class="na">withType</span><span class="o">(</span><span class="n">JavaCompile</span><span class="o">)</span> <span class="o">{</span>
        <span class="n">compileTask</span> <span class="o">-&gt;</span> <span class="n">compileTask</span><span class="o">.</span><span class="na">dependsOn</span> <span class="n">ndkBuild</span>
    <span class="o">}</span>
<span class="o">}</span>
</code></pre></div></div>

<h2 id="troubleshooting">Troubleshooting</h2>

<h3 id="ndk-not-configured">NDK not configured</h3>

<p>If you get this kind of error:</p>

<div class="language-text highlighter-rouge"><div class="highlight"><pre class="highlight"><code>Execution failed for task ':app:compileX86ReleaseNdk'.
&gt; NDK not configured
</code></pre></div></div>

<p>This means the tools haven’t found the NDK directory. You have two ways to fix it: set the <strong>ANDROID_NDK_HOME</strong> variable environment to your NDK directory and delete <strong>local.properties</strong>, or set it manually inside <strong>local.properties</strong>:</p>

<div class="language-text highlighter-rouge"><div class="highlight"><pre class="highlight"><code>ndk.dir=C\:\\Android\\ndk
</code></pre></div></div>

<h3 id="no-rule-to-make-target">No rule to make target</h3>

<p>If you get this kind of error:</p>

<div class="language-plaintext highlighter-rouge"><div class="highlight"><pre class="highlight"><code>make.exe: *** No rule to make target ...\src\main\jni
</code></pre></div></div>

<p>This may come from a current <a href="https://code.google.com/p/android/issues/detail?id=66937">NDK bug</a> on Windows, when there is only one source file to compile. You only need to add one empty source to make it work again.</p>

<h3 id="other-issues">Other issues</h3>

<p>You may also find some help on the official adt-dev google group: <a href="https://groups.google.com/forum/#!forum/adt-dev">https://groups.google.com/forum/#!forum/adt-dev</a>.</p>

<h2 id="getting-more-information-on-ndk-integration">Getting more information on NDK integration</h2>

<p>The best place to get more information is the official project page: <a href="http://tools.android.com/tech-docs/new-build-system">http://tools.android.com/tech-docs/new-build-system</a>.</p>

<p>You can look at the changelog and if you scroll all the way down you’ll also get access to sample projects dealing with NDK integration, inside the latest “gradle-samples-XXX.zip” archive.</p>]]></content><author><name>Xavier Hallade</name></author><category term="Android" /><category term="adt" /><category term="Android" /><category term="Android Build System" /><category term="Android Studio" /><category term="gradle" /><category term="NDK" /><summary type="html"><![CDATA[With the recent changes (release 0.7.3 around Dec 27), the new Android Build System starts to be really interesting also if you are using the NDK!]]></summary></entry><entry><title type="html">x86 version of AllJoyn for Android platforms</title><link href="https://ph0b.com/alljoyn-for-x86-android-platforms/" rel="alternate" type="text/html" title="x86 version of AllJoyn for Android platforms" /><published>2013-12-12T13:31:02+00:00</published><updated>2013-12-12T13:31:02+00:00</updated><id>https://ph0b.com/alljoyn-for-x86-android-platforms</id><content type="html" xml:base="https://ph0b.com/alljoyn-for-x86-android-platforms/"><![CDATA[<p>Alljoyn is a cross-platform library designed for peer-to-peer communication between various devices over different transports.</p>

<p>This library is open-source (Apache License) and initially created by Qualcomm Innovation Center. The project has joined the AllSeen Alliance two days ago and now it’s hosted here: <a href="https://allseenalliance.org/source-code">https://allseenalliance.org/source-code</a></p>

<p>Even if the precompiled x86 version isn’t distributed from the official website, compiling it from the sources is perfectly supported.</p>

<p>When you download the release package for Android, here is what you get:</p>

<div class="language-text highlighter-rouge"><div class="highlight"><pre class="highlight"><code>cpp/    core AllJoyn functionality, implemented in C++
          - built from Git projects alljoyn_core and common
          - required for all AllJoyn applications
java/   optional Java language binding          (built from alljoyn_java)
          - required for Android apps
c/      optional ANSI C language binding        (built from alljoyn_c)
          - required by Unity binding
unity/  optional Unity language binding         (built from alljoyn_unity)
about/  implements AllJoyn About Feature. (built from about.git/(cpp and java))
</code></pre></div></div>

<p>If you use the Java binding <strong>alljoyn.jar</strong>, you’ll end up with <strong>liballjoyn_java.so</strong> in <strong>lib/armeabi</strong>/. The binaries (.so/.a files) from this package are ARMv5 only but compiling it from the sources is perfectly supported.</p>

<p>Here is the x86 release version I’ve compiled for you: <a href="/wp-content/uploads/2013/12/alljoyn-3.4.5-android-sdk-rel-x86.zip">alljoyn-3.4.5-android-sdk-rel-x86.zip</a>. It follows the same architecture than the ARMv5 release.</p>

<p>If you’re just using the AllJoyn .jar on Android, you can directly get the <a href="/wp-content/uploads/2013/12/liballjoyn_java_x86.zip">liballjoyn_java.so</a> and put it inside the <strong>lib/x86</strong> directory of your Android application.</p>

<p>If you want to recompile it yourself or know more about the process, here is what I did:</p>

<h2 id="recompiling-alljoyn-for-x86-based-android-platforms">Recompiling Alljoyn for x86-based Android platforms</h2>

<p>First, get the sources:</p>

<div class="language-shell highlighter-rouge"><div class="highlight"><pre class="highlight"><code>git clone https://git.allseenalliance.org/gerrit/core/alljoyn
<span class="nb">cd </span>alljoyn
</code></pre></div></div>

<p>Then, retrieve <strong>libcrypto.so</strong> and <strong>libssl.so</strong> from a real x86 device or the x86 emulator and put them inside <strong>build/android/x86/release/dist/cpp/lib/</strong> :</p>

<div class="language-shell highlighter-rouge"><div class="highlight"><pre class="highlight"><code><span class="nb">mkdir</span> <span class="nt">-p</span> build/android/x86/release/dist/cpp/lib/
adb pull /system/lib/libcrypto.so build/android/x86/release/dist/cpp/lib/
adb pull /system/lib/libssl.so build/android/x86/release/dist/cpp/lib/
</code></pre></div></div>

<p>Now you can build the lib for x86 as explained by the project documentation – the tedious part being the need of having a copy of the AOSP sources:</p>

<div class="language-shell highlighter-rouge"><div class="highlight"><pre class="highlight"><code><span class="nb">export </span><span class="nv">CLASSPATH</span><span class="o">=</span>/usr/share/java/junit.jar
scons <span class="nv">OS</span><span class="o">=</span>android <span class="nv">CPU</span><span class="o">=</span>x86 <span class="nv">ANDROID_NDK</span><span class="o">=</span>/opt/android-ndk <span class="nv">ANDROID_SDK</span><span class="o">=</span>/opt/android-sdk <span class="nv">ANDROID_SRC</span><span class="o">=</span>/home/ph0b/android-build <span class="nv">VARIANT</span><span class="o">=</span>release <span class="nv">BINDINGS</span><span class="o">=</span>cpp,c,java,unity
</code></pre></div></div>]]></content><author><name>Xavier Hallade</name></author><category term="Android" /><category term="AllJoyn" /><category term="Android" /><category term="Intel" /><category term="library" /><category term="x86" /><summary type="html"><![CDATA[Alljoyn is a cross-platform library designed for peer-to-peer communication between various devices over different transports.]]></summary></entry><entry><title type="html">Porting libaacdecoder to x86</title><link href="https://ph0b.com/porting-libaacdecoder-to-x86/" rel="alternate" type="text/html" title="Porting libaacdecoder to x86" /><published>2013-12-12T10:35:55+00:00</published><updated>2013-12-12T10:35:55+00:00</updated><id>https://ph0b.com/porting-libaacdecoder-to-x86</id><content type="html" xml:base="https://ph0b.com/porting-libaacdecoder-to-x86/"><![CDATA[<p><strong><em>Latest update: the maintainer of the lib accepted my patch, 0.7+ release packages now include x86 libs: <a href="https://code.google.com/p/aacdecoder-android/downloads/list" title="aacdecoder downloads">aacdecoder releases</a></em></strong></p>

<p>Porting is a big word here ! As often, adding x86 support to libaacdecoder was a matter of fixing Makefiles.</p>

<p><a href="https://code.google.com/p/aacdecoder-android/" title="libaacdecoder">libaacdecoder</a> supports AAC as well as MP3 decoding through the use of OpenCore decoders. It’s based on <a href="https://code.google.com/p/opencore-aacdec/">opencore-aacdec</a> which compiles fine for x86.</p>

<p>The release package, as of 0.6.1, includes only binaries for ARMv5 and ARMv7. If you try to recompile it by yourself from the sources, you may even think that other architectures aren’t supported… but this is wrong!</p>

<p>If you’re in a hurry, here is the compiled library package (version 0.6.1) with the x86 version of libaacdecoder.so added: <a href="/wp-content/uploads/2013/12/aacdecoder-android-libs-0.6.1.zip">aacdecoder-android-libs-0.6.1.zip</a></p>

<p>And now for the “technical details”, 2 small changes where involved:</p>

<h2 id="1-as-usual-add-x86-to-the-list-of-targeted-abis">1. As usual, add x86 to the list of targeted ABIs</h2>

<p>Open ./decoder/jni/Application.mk and add x86 to the list of ABIs or simply put “all”:</p>

<div class="language-make highlighter-rouge"><div class="highlight"><pre class="highlight"><code><span class="nv">APP_ABI</span> <span class="o">:=</span> all
</code></pre></div></div>

<p>Now if you call ndk-build again, the toolchain will try to generate x86 versions of the library as well, but here it will fail with many errors like these:</p>

<div class="language-text highlighter-rouge"><div class="highlight"><pre class="highlight"><code>...
     [exec] ./codecs_v2/audio/mp3/dec/src/asm/pvmp3_dct_16_gcc.s:225: Error: no such instruction: `smull r9,r7,r11,r7'
     [exec] ./codecs_v2/audio/mp3/dec/src/asm/pvmp3_dct_16_gcc.s:226: Error: too many memory references for `add'
     [exec] ./codecs_v2/audio/mp3/dec/src/asm/pvmp3_dct_16_gcc.s:227: Error: too many memory references for `sub'
...
</code></pre></div></div>

<p>because it’s trying to integrate ARM assembly code. Let’s fix this:</p>

<h2 id="2-fix-the-list-of-sources-set-inside-opencore-mp3dec-makefile">2. Fix the list of sources set inside opencore-mp3dec Makefile</h2>

<p>Open ./decoder/jni/opencore-mp3dec/Android.mk.</p>

<p>You’ll see ARM asm sources included:</p>

<div class="language-make highlighter-rouge"><div class="highlight"><pre class="highlight"><code><span class="nv">LOCAL_SRC_FILES</span> <span class="o">:=</span> <span class="se">\</span>
...
  <span class="err">src/asm/pvmp3_dct_16_gcc.s</span> <span class="err">\</span>
  <span class="err">src/asm/pvmp3_dct_9_gcc.s</span> <span class="err">\</span>
  <span class="err">src/asm/pvmp3_mdct_18_gcc.s</span> <span class="err">\</span>
  <span class="err">src/asm/pvmp3_polyphase_filter_window_gcc.s</span>
</code></pre></div></div>

<p>Of course these can’t be compiled for x86… but inside src/ you already have C++ equivalents that can ! So you just need to conditionally include these:</p>

<div class="language-make highlighter-rouge"><div class="highlight"><pre class="highlight"><code><span class="k">ifeq</span> <span class="nv">($(TARGET_ARCH),arm)</span>
  <span class="nv">LOCAL_SRC_FILES</span> <span class="o">+=</span> <span class="se">\</span>
    src/asm/pvmp3_dct_16_gcc.s <span class="se">\</span>
    src/asm/pvmp3_dct_9_gcc.s <span class="se">\</span>
    src/asm/pvmp3_mdct_18_gcc.s <span class="se">\</span>
    src/asm/pvmp3_polyphase_filter_window_gcc.s
<span class="k">else</span>
  <span class="nv">LOCAL_SRC_FILES</span> <span class="o">+=</span> <span class="se">\</span>
    src/pvmp3_dct_16.cpp <span class="se">\</span>
    src/pvmp3_dct_9.cpp <span class="se">\</span>
    src/pvmp3_mdct_18.cpp <span class="se">\</span>
    src/pvmp3_polyphase_filter_window.cpp
<span class="k">endif</span>
</code></pre></div></div>

<p>While you’re here, you’ll also see an ARM macro always defined:</p>

<div class="language-make highlighter-rouge"><div class="highlight"><pre class="highlight"><code><span class="nv">LOCAL_CFLAGS</span> <span class="o">:=</span> <span class="nt">-DPV_ARM_GCC_V4</span> <span class="nv">$(PV_CFLAGS)</span>
</code></pre></div></div>

<p>It will be better to conditionally set it:</p>

<div class="language-make highlighter-rouge"><div class="highlight"><pre class="highlight"><code><span class="nv">LOCAL_CFLAGS</span> <span class="o">:=</span>  <span class="nv">$(PV_CFLAGS)</span>
<span class="k">ifeq</span> <span class="nv">($(TARGET_ARCH),arm)</span>
  <span class="nv">LOCAL_CFLAGS</span> <span class="o">+=</span> <span class="nt">-DPV_ARM_GCC_V4</span> 
<span class="k">endif</span>
</code></pre></div></div>

<p>Once these changes are done you’ll be able to compile libaacdecoder for all the supported architectures.</p>

<p>Here is the latest release package, updated with all the libs: <a href="/wp-content/uploads/2013/12/aacdecoder-android-libs-0.6.1.zip">aacdecoder-android-libs-0.6.1.zip</a></p>]]></content><author><name>Xavier Hallade</name></author><category term="Android" /><category term="aac" /><category term="Android" /><category term="Intel" /><category term="library" /><category term="media" /><category term="porting" /><category term="x86" /><summary type="html"><![CDATA[Latest update: the maintainer of the lib accepted my patch, 0.7+ release packages now include x86 libs: aacdecoder releases]]></summary></entry></feed>